Sunday, April 24, 2016

Salute 2016, The Battle of Foteviken and some 28mm AWI

Last week I was at Salute. The main reason of me being there was to be a part in an effort to set up a demo game at Salute. The theme of the game was the battle of Foteviken 1134.  The story of this battle is by all accounts rather obscure and mainly a part of Danish history, even though it took place on what is now Swedish soil. In short it was a great slaughter that ended up with a number of dead Bishops and the King of Denmark being hacked to pieces. The most fascinating pice of it all was the fact that it took place after the Viking era and that the outlook of this battle was a mix of what is usually associated with Viking era combat and what is belonging to a later era. Thus getting the right minis to this game was a matter of ransacking ones stash of both Norman and Viking minis to get the right look.

Jonas, Jan and Michael

The forces of the Danish King

The Foteviken pier and the Church

The Invasion fleet....

Another picture of the battle

In all We were 6 persons running this game at Salute. I wish to thank Micke(Dalauppror), Jonas, Jan, Tony, Colin Steve for making this a enjoyable experince. Hopefully we will be able to stage something next year.


Visiting Salute without buying minis is almost impossible. I made no serious effort to resist the urge. I went to number of stands and made myself a bit more of a pauper for each visit. Below you can see some results of my purchases. I needed additional units to my American War of Independance project. Thus I bought some 28mm American militia from Perry miniatures. The flags are from Flags of War.


Rebellious American Militia from the War of Ametican Independance

Another view of the same unit


Sunday, April 10, 2016

'The Hammer' Rides Again

Earlier this week we had another most enjoyable game of Pikeman's Lament at the club. As usual this was part of our ongoing campaign set in 1625 during the Polish-Swedish War in the area of Kokenhausen in today's Latvia.
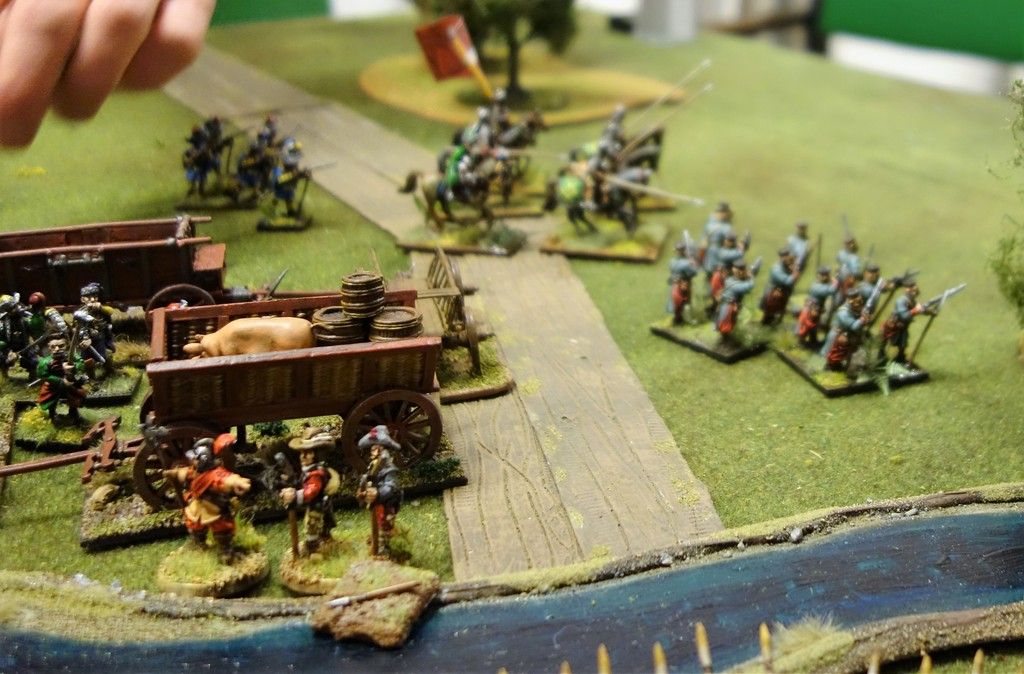
This scenario is called Defending the Supplies and featured the sneaky and underhanded Poles raiding a Swedish supply base. The supply base consisted of two lightly entrenched areas, each with 2 supply tokens. Each supply token was worth a variable number of Honour points. The Polish mission was to steal as many of these supply tokens as possible and carry them off-table to gain these Honour points, while the Swedes needed to stop them and retain control of the supply tokens, and thus the Honour points. The side with the most Honour Points at game end wins this mission.
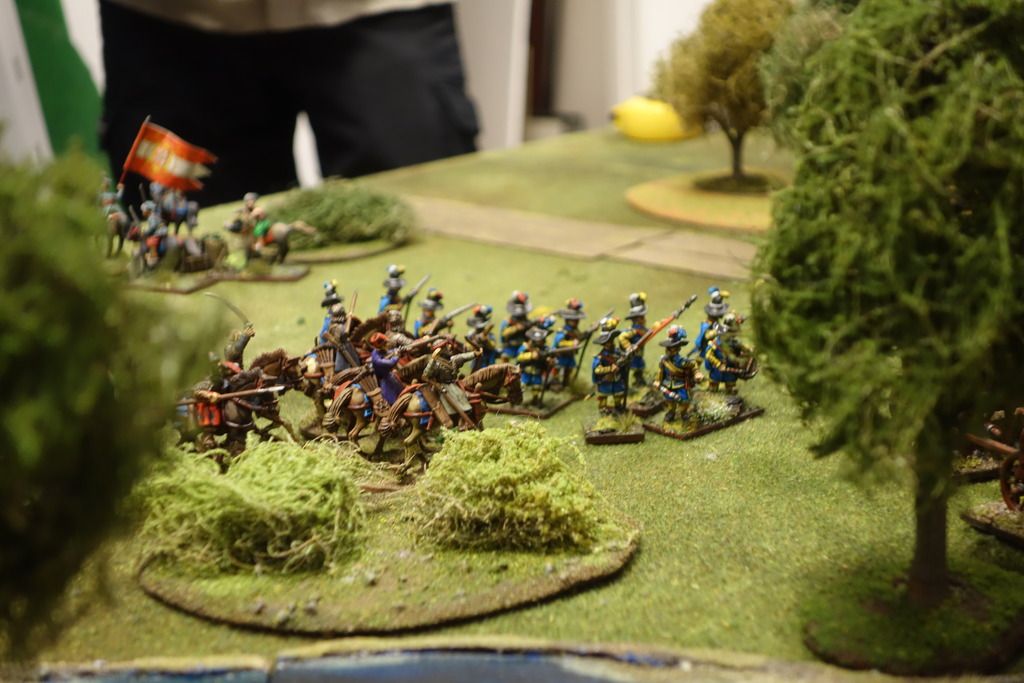
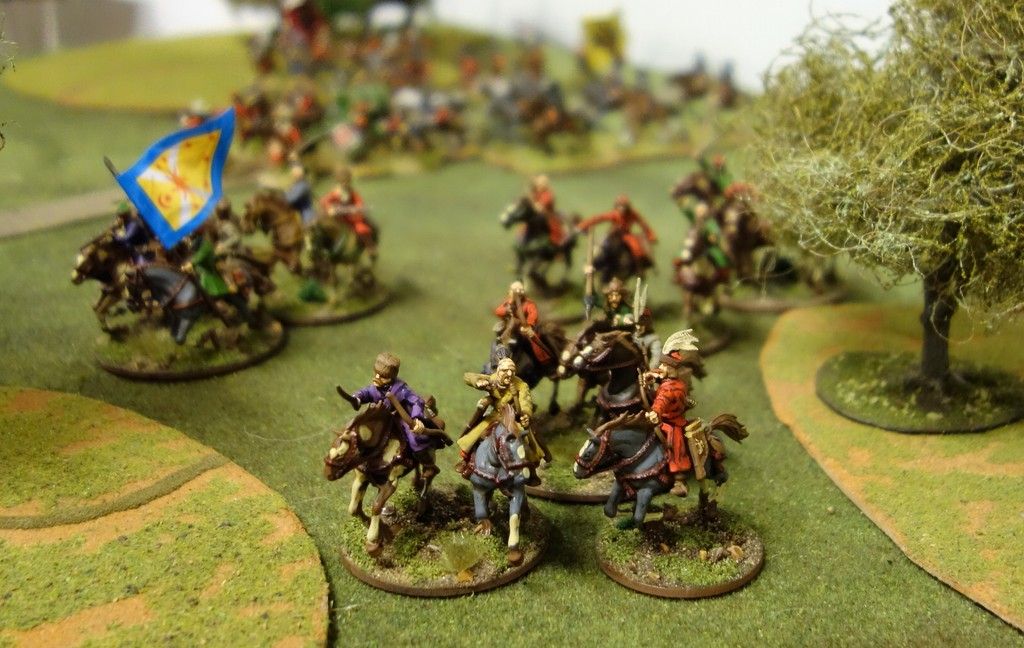
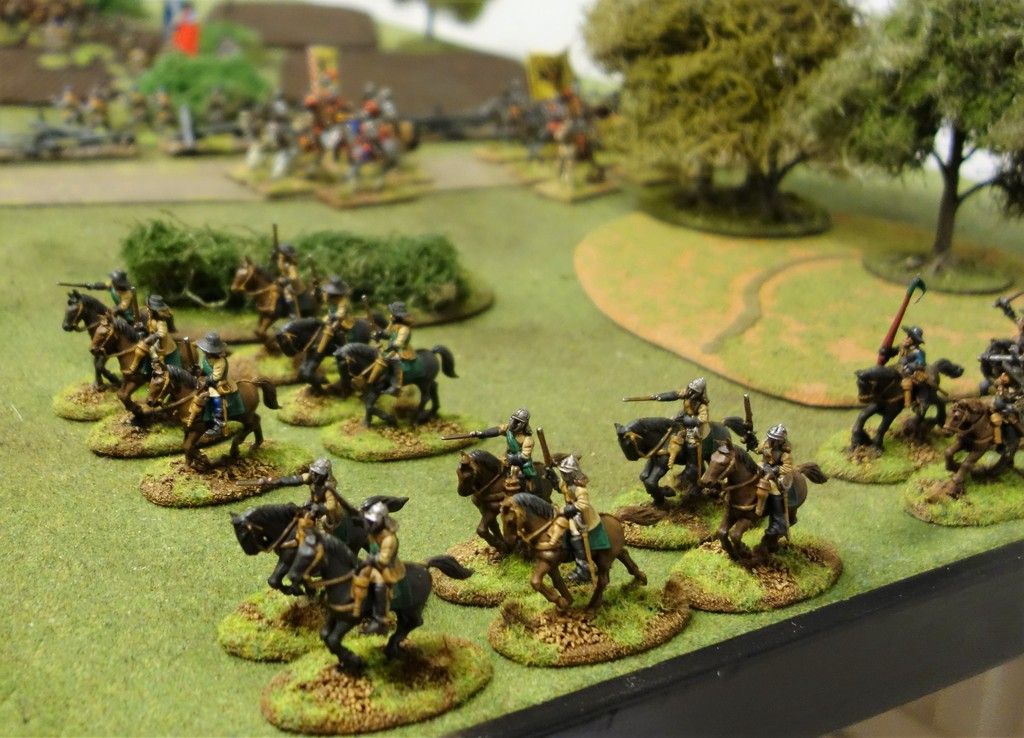
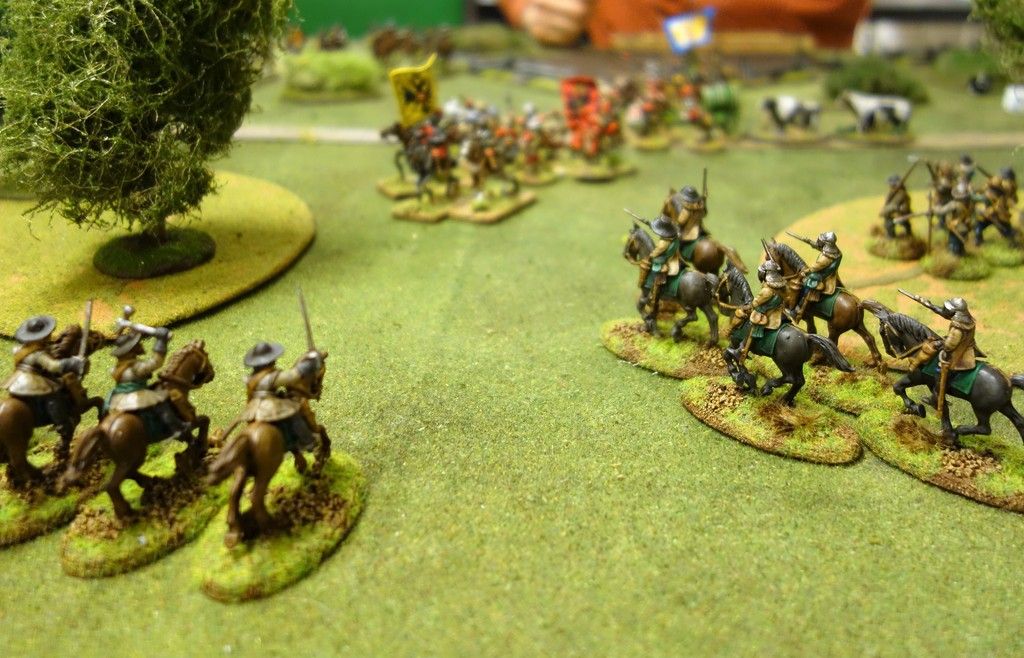
The Västgöta cavalry contingent advances with the Flemish and Scots visible in the background.
The Swedish and Polish main forces set up near the short table edges. The Swedish supply base was located in the middle of the table, slightly closer to the Polish short table edge, and defended by a couple of units of skirmish musketeers (Commanded Shot).
The Swedish force consisted of 3 Companies of 16 points each. The Polish forces had 2 companies of 24 points each (so 48 pts total per side, a fairly large game). After the recent string of glorious Swedish victories, the esteemed mercenary commander van Kökkenpanne had switched sides again and was now fighting for the Swedes.

The Polish Companies:

Hetman Shere Khan - Cossacks
3 x Heavy Cossack cavalry (Trotters in game terms) - One of which was led by the Hetman
2 x Light Cossack cavalry (Veteran Dragoons)
Shere Khan is actually a Tartar, but for some reason his Polish employers insist on calling him a Cossack. This annoys him immensely, but what can one do?

Rotameister Kowalski - Poles
1 x Haiduk Forlorn Hope (Aggressive Forlorn Hope) - led by Kowalski himself
1 x Pancerny lancers (Gallopers)
1 x Reiters (Trotters)
1 x Krakow Militia Musketeers (Shot)
1 x Haiduk Musketeers (Veteran Shot)

The Swedish Companies:

Captain Henrik 'the Hammer' - Västgöta Ryttare & attached units
1 x Västgöta Ryttare (Elite Gallopers) - led by Henrik
1 x Mercenary German Reiters (Trotters)
1 x Krak's Djurskyttar (Veteran Dragoons)

Lieutenant Darrcounter - Mackays Regiment of Scots
1 x Pikemen (Pike) - led by Darrcounter
1 x Lancers (Aggressive Gallopers)
1 x Borderers (Trotters
2 x Skirmishing Musketeers (Commanded Shot)

Lieutenant van Kökkenpanne - Flemish Mercenary Company
2 x Skirmishing Musketeers (Commanded Shot) - defending the supply base
2 x Flemish Curassiers (Elite Trotters) - one of which was led by van Kökkenpanne

As the Swedes needed to move fast to intercept the Poles, I chose to field an entirely mounted force for the Västgöta contingent.
The Cossack command was deployed on the more open flank while the Rotameister's Poles deployed the opposite the closest of the Swedish supply bases.
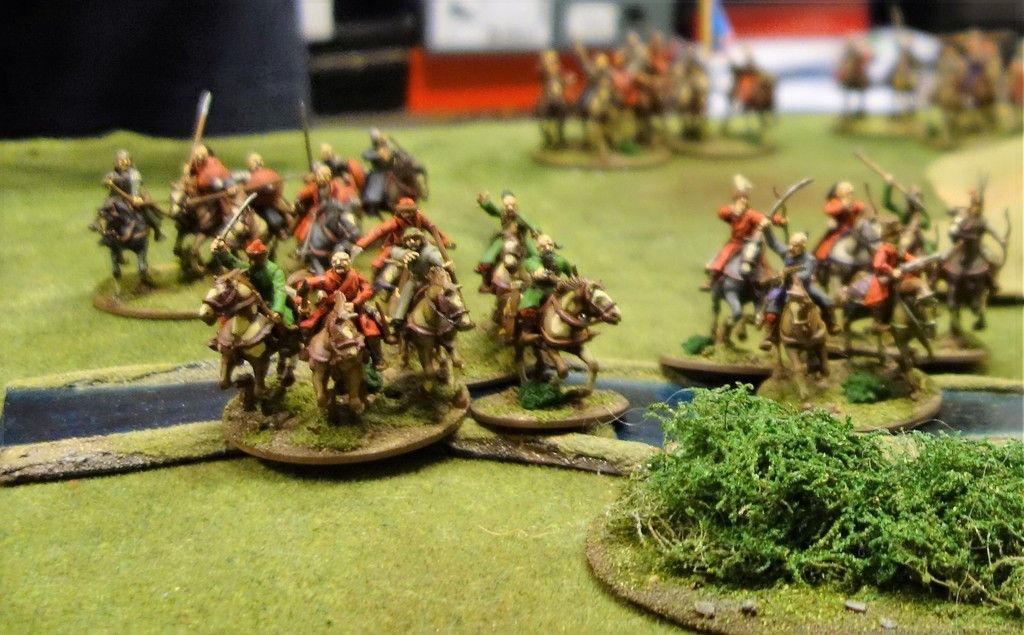
The Cossacks are coming!
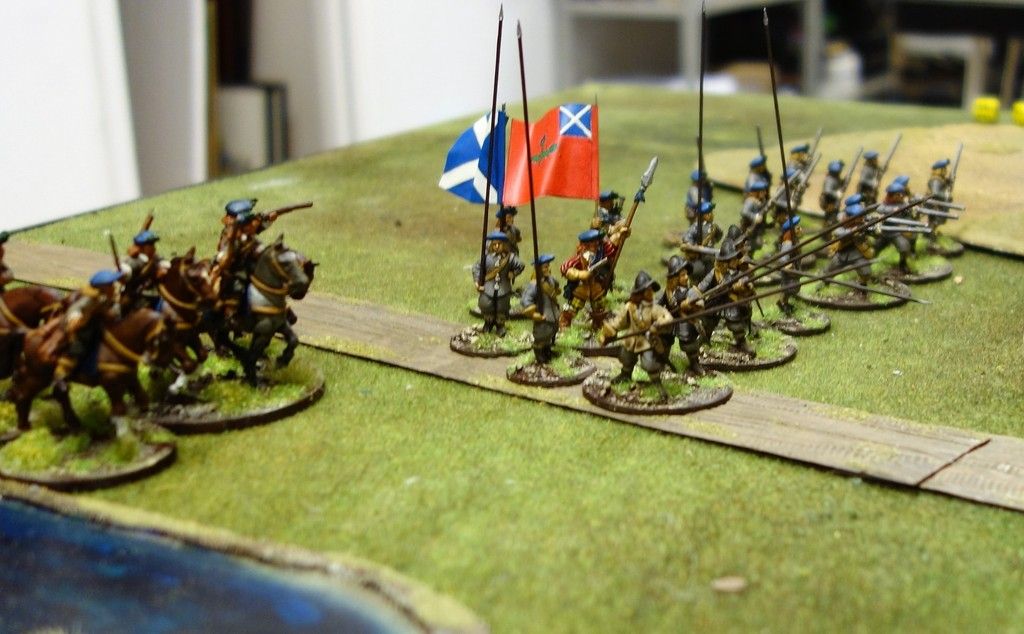
The Swedish force deployed with the Flemish Curassiers in the centre, the Västgöta Ryttare on the left flank (facing the Cossacks) and the Scots on the right flank (facing the Rotameister's force).
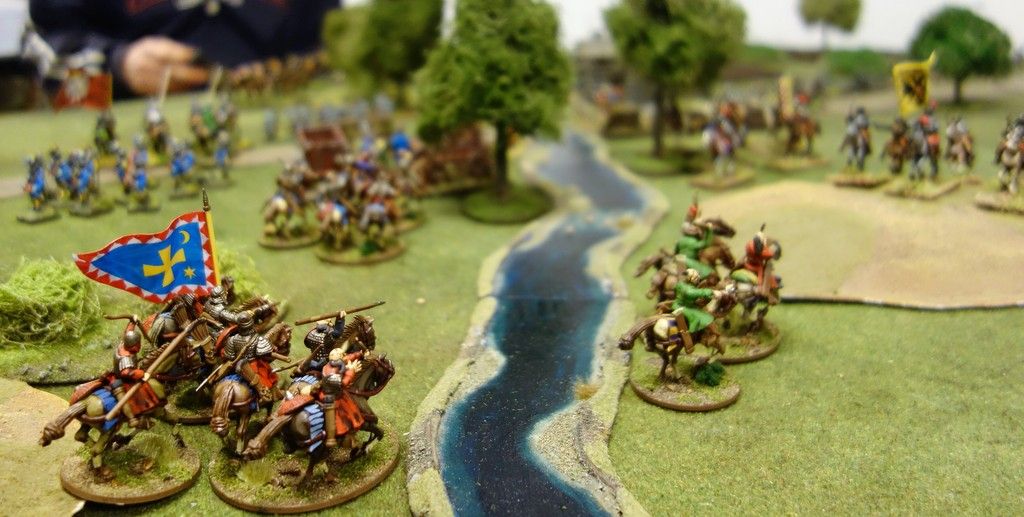
The Flemish Curassiers advance down the road.
So the scenario was basically a race with Poles dashing in to eliminate the small supply base garrison and carry off the supplies as the Swedes rush to stop them.
As attackers in this mission, the Poles moved first. Both sides enjoyed fairly good command dice so both armies moved forward quite quickly.
Very soon the Poles were in range of the first supply base and prepared to assault the lone Flemish Commanded Shot unit defending it. But the brave Flemish fired first and managed to hit the Polish Reiters and force them to fall back in disarray. So first blood to the good guys!
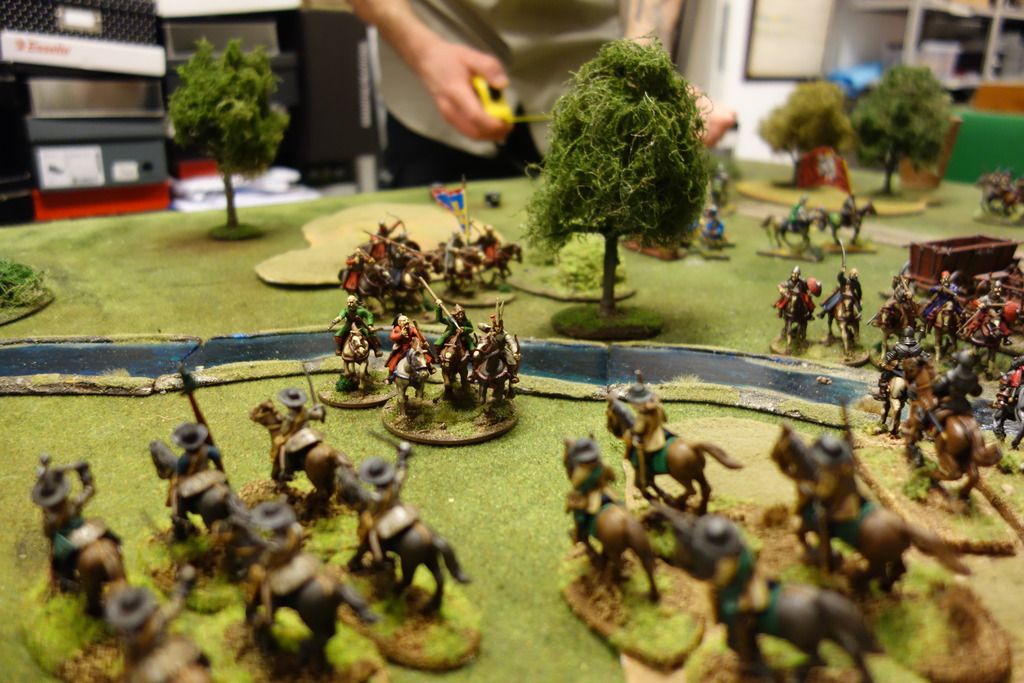
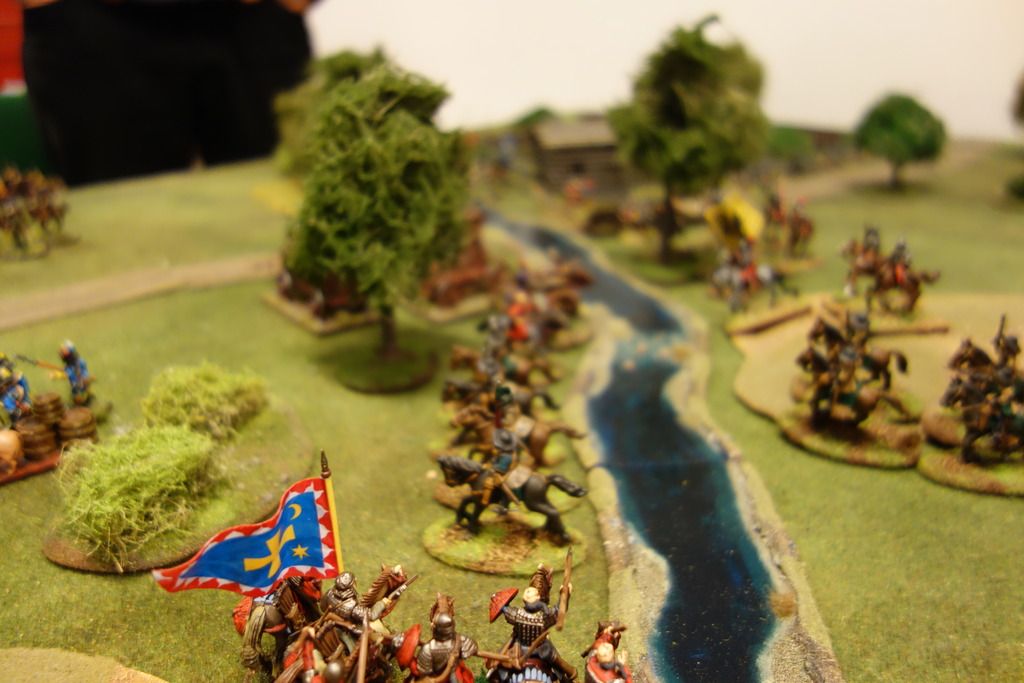
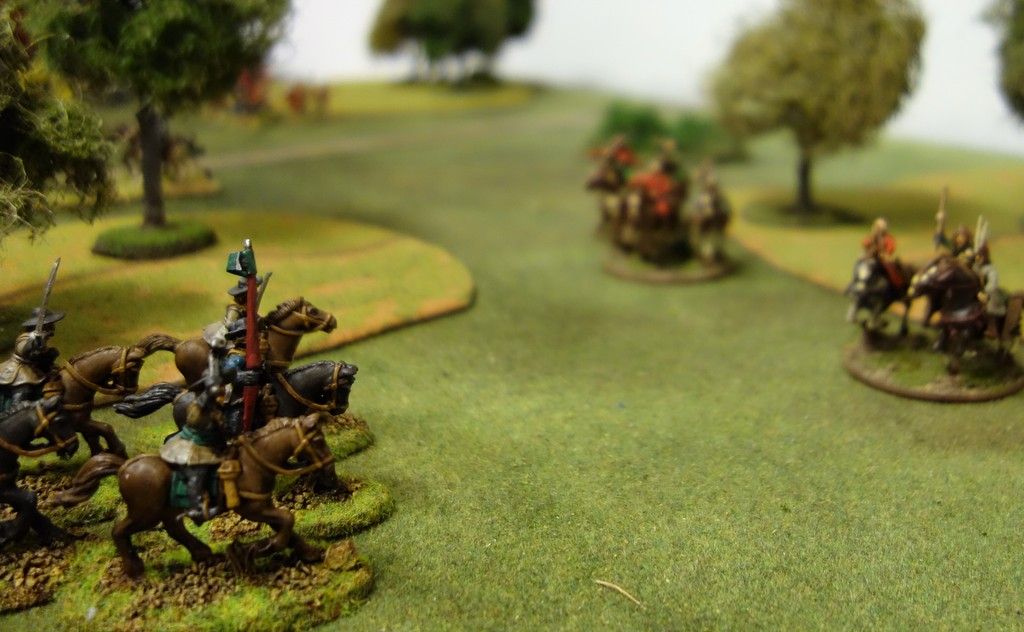
Meanwhile the Cossacks surged across a small stream to engage our hero Henrik's Västgöta units and a long range duel broke out between the Cossack light horse and the Swedish Dragoons and mercenary Reiters.
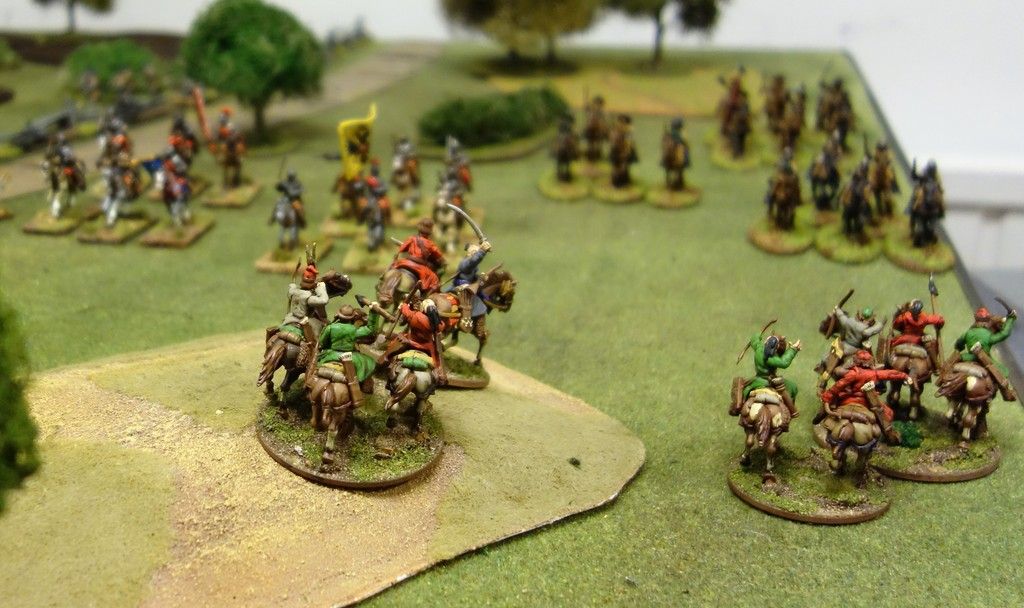
Cossack light cavalry skirmishing against the Swedish and Flemish horse
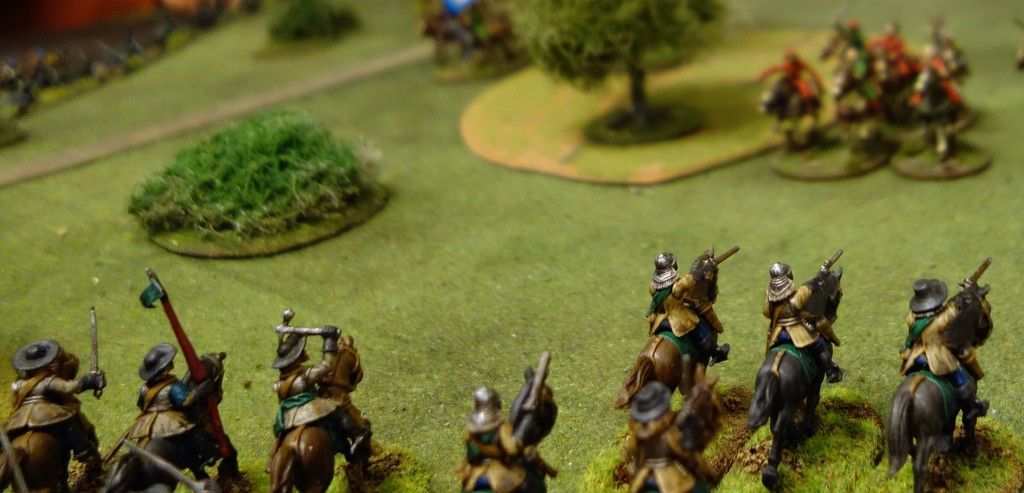
On the Swedish right flank the Scots moved forward while the Poles prepared to asssault the supply bases. All in all, it was quite tense race.

The doughty Flemish muskeeters in the first supply base had forced back the Polish Reiters, but were then assaulted by the Haiduk Forlorn Hope and forced out of their position.
The cavalry battle rages on
Still, they managed to inflict some losses on the Rotameister's best unit. Unfortunately the Polish Reiters quickly rallied and rushed forwad to steal one of the supply items and started to move off with it as the rest of the Polish contingent surged forward to try and assault the second supply base before the Flemish and Scots intervened.

On the Swedish left flank, the Västgöta contingent's Dragoons and Reiters took some losses fighting the Cossack light cavalry, but managed to inflict even more severe losses on their opponents and forced them back. The Cossack commander reacted to this by sending forward a couple of his heavy cavalry units to support the failing light Cossack units.
The Cossacks are being forced back by the Swedish Västgöta cavalry and the Flemish Curassiers
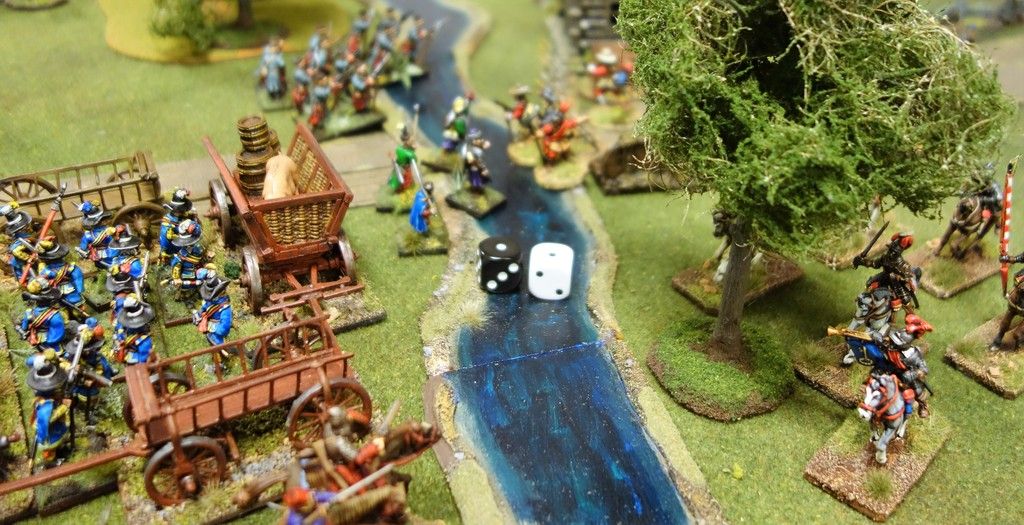
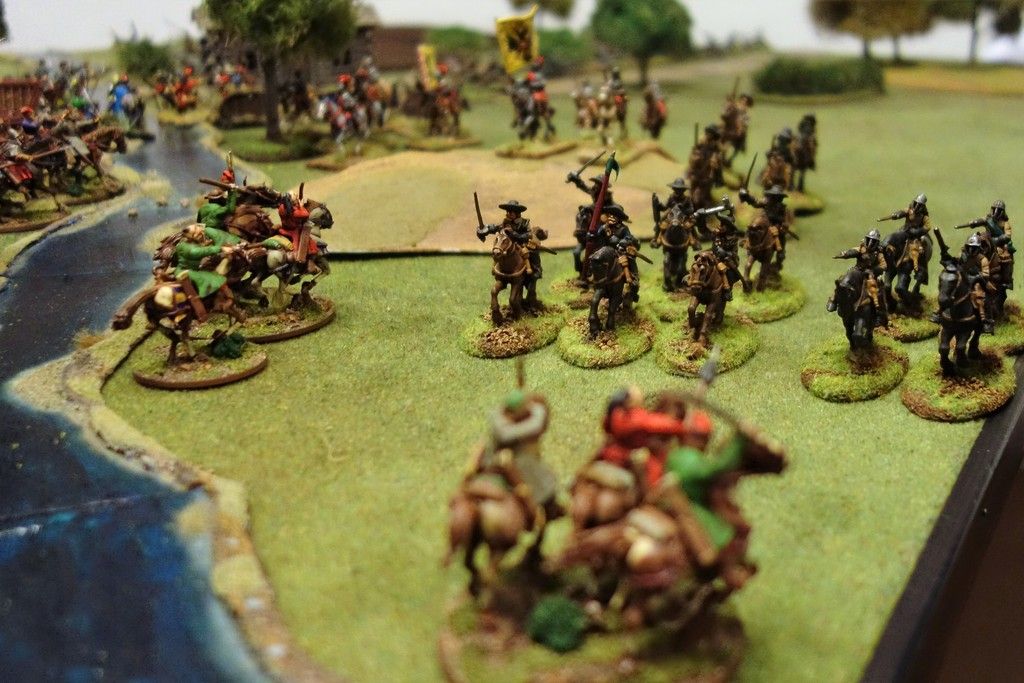
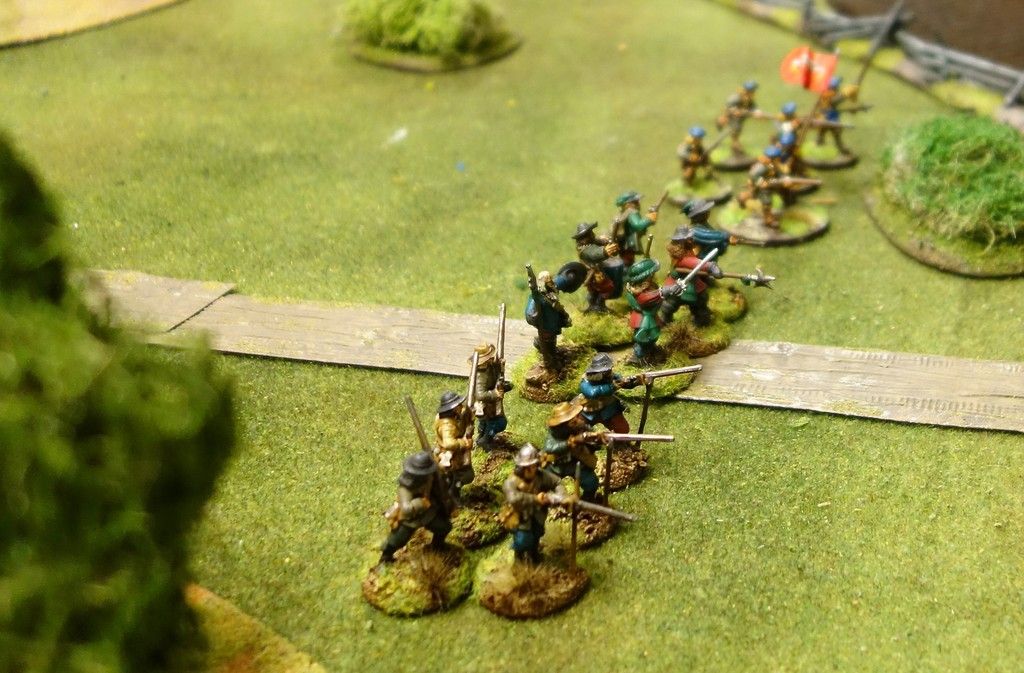
The Poles in the centre and on the Swedish right flank then sent in their main assault on the second Swedish supply base using the Haiduk Forlorn Hope and the Haiduk Musketeers supported by the Militia Musketeers, while the Polish Pancerny guarded the flank against the crafty Scots who had sent the Reiters and the Scots Lancers around the flank and were now in a position to seriously threaten the main Polish assualt from the flank as the Scots infantry held the centre. The Flemish Curassiers were now in position to start engaging both the Cossacks and the Polish infantry with their deadly caracole pistol volleys.

Meanwhile the sneaky Polish Reiters ran off the table with the first supply token. Darn.
The Krakow militia rush forward to put pressure on the second Swedish supply base as the sneaky Polish Reiters in the background ride off with the first supply token

And now came the climax of the battle. The Polish Haiduks forced the second Flemish Commanded Shot unit to fall back with heavy losses as the Haiduk Forlorn Hope advanced into the small stream to assault the second Supply base. But then the Flemish Curassiers delivered a devastating salvo and decimated the Haiduk Forlorn Hope, hitting the Rotameister himself and forcing the Haiduks to flee. At this point the assault stalled and the Cossack commander started sending uncomitted heavy cavalry to help in the centre.
Die Roll of Doom! Rotameister Kowalski is knocked out by a pistol volley from the Flemish Curassiers.

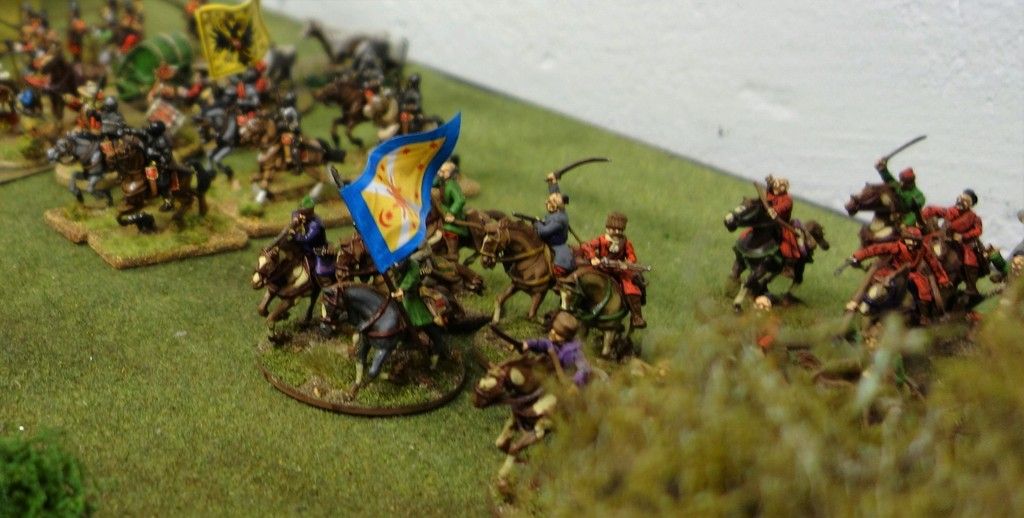
And then the Cossacks suffered a comparable major loss as  a horrible command die roll by the Polish Cossacks left one of their heavy cavalry units disrupted in front of the Västgöta cavalry.
Hammered! Västgöta Ryttare has just utterly destroyed a Cossack unit of Heavy cavalry and is just about to charge the hapless Cossack light horse. This is going to hurt.....
Henrik 'the Hammer' seized this opportunity to live up to his name and immediately charged the unlucky Cossacks with his Västgöta Ryttare and utterly destroyed it.
Another view of Henrik's glorious charge.

He then impetuously charged on to engage one of the remaining Cossack light cavalry units. This second unit managed to evade slightly, luring the Swedes into the bad terrain of the stream. Still, the Västgöta cavalry managed to win this fight too and found itself on the other side of the stream were it was fired on by the remaining Cossacks and suffered som casualties.
Sensing a looming disaster, the sneaky Krakow Militia Musketeers picked up the second supply taken from the first supply base that had been overrun earlier and ran for the table edge to at least gain some loot.
Repulsed! The Polish infantry attack stalls as the Scots menace the Polish flank and the Polish Forlorn Hope are decimated and forced back.

The Scots mounted troops then attacked from the flank to stop the Krakow militia both from escaping with the supply token and to keep the momentum of the attack going. At the same time, the Haiduk Musketeers were hit by several volleys and wavered.
The final push. Depleted Polish infantry make a last desperate attempt to secure the second supply base. It's not enough

The Scots Reiters attacked the Krakow Militia and forced them to drop the precious supplies. At the same time, the Scots lancers charged and destroyed the few remaining Haiduk Forlorn Hope and then continued on to strike the Haiduk Musketeers and took them out of the game.

Henrik withdrew the depleted Västgöta Ryttare back across the stream to get away from the Cossack firepower and brought up the Dragoons and Reiters to continue to wear down the enemy, while the Flemish Curassiers continued to pour salvoes into the reeling Cossacks.
Poles managed to drive off the Scots Reiters and regain control of the contested supply token and carry it off table while the remaining Cossacks and Poles continued to suffer serious casualties.
The end is near. Polish infantry take another supply token off table as the Swedish, Flemish and Scots apply increasing pressure.
As the Poles managed to carry the supply token off table we decided to end the game. The Poles were clearly not going to be able to capture any more supplies and were under increasing pressure, so we assumed that the remaining Polish forces would withdraw.
  
So in the end, the Poles had managed to grab two supply tokens, while the Swedes retained control of two others. It so happened that the Supply tokens the Poles had taken were worth a total of 5 Honour points, while the supply tokens kept by the Swedes were worth 6 Honour points.
So the participating Swedish Companies gained 6 Honour points each, while the Polish Companies received 5, making this a Swedish victory by the slimmest of margins.
But, slim or not, it was another glorious victory for the forces of His Majesty the King of Sweden.
In the aftermath of the battle we needed to determine the fate of Rotameister Kowalski who had been knocked out during the game. And after some die rolling, it turned out that the Rotameister's tribulations on this day did not end by being hit by a pistol ball. The Rotameister was trying to escape while disguised as a nun, but this turned out to be a bad choice of disguise. An observant patrol of Västgöta cavalrymen spotted a portly and limping 'nun' with a rather extravagant moustache. Further investigation revealed the Rotameister's true identity, and he was led off to captivity by amused Västgöta troopers. The Rotameister was not amused, but allowed to ransom himself a few days later (losing most Honour points he had gained in the battle). By some miracle he was promoted anyway and gained the ability Patient. This allows him to have one of his units ignore tests for uncontrollable charges.

Henrik 'the Hammer' is more than satisfied with his day's work, having led a successful cavalry charge and gotten very close to another promotion.
van Kökkenpanne and Darrcounter were also well pleased. van Kökkenpanne was promoted and gained a new ability that allows him to automatically activate one unit for a Shot action, while Darrcounter's promotion gave him an ability that makes him a fearsome opponent in personal duels.


Monday, March 28, 2016

Danish/Scanian Leidang and Hird, Foteviken 1134

The Scanian Hird, these are the really tough guys. They had weapon and armor that was quite up to date( or so I assume)

As some of you might know I was recruited by Michael(Dalauppror) to help him out with a gaming project that will be displayed at Salute this year. The project has been called Project F. The project covers the battle of Foteviken 1134. It took place in present day Scania in southern Sweden, but back then this was part of Denmark. The battle was more or less a part of Danish civil war. Details about the battle , the rules used and the demo game that will run at Salute can be found on the Dalauppror blog. 

I have created a piece of Scenery for this project( a church) and I have now completed some units as well. I was supposed to paint 4 Leidang units(foot levy)and one Hird( the retinue of a king or a higher noble). As bonus I painted up some skirmishers as well.

Below you see some examples of what I painted. It is three Leidang units and a small unit of skirmishers. The minis are a wild mix of what I had in my bit box and a box of plastic minis from Conquest miniatures. The Scandinavians had left the Viking era by the time this battle took place, but the weapons and armor used was probably a sort of mix of old Viking and this a bit more modern for it's day.

The Leidang was basically armed peasants, a levy called upon when the King needed to wage war. Not necessarily just for defensive tasks.


Leidang number 2. Quite few of these peasants seems to be quite well off. They have chain mail and proper weapons.


Leidang number 3

The skirmishers, the guys withe missile weapons.


Saturday, March 19, 2016

The 'Hammer' Strikes Again


Earlier this week we played another thoroughly enjoyable game of Pikeman's Lament, part of our ongoing campaign setting of the Swedish Polish War of 1625-1629.
This time we played a mission called 'Beef on the Hoof' in which one side is escorting a convoy of wagons and livestock across the table. The opponent's task is to chase off the escort and take control of the convoy with all the goodies.
This is certainly historical as all armies suffered from chronic supply difficulties and the supply convoys were absolutely essential.
An overview of the battle, background and some very nice photos can be found on Dalauppror's blog
The Swedish and Scots advance guard await the arrival of the Poles and Flemish. Will they be able to hold off the enemy long enough?
In the centre of the table a small Swedish/Scottish force was awaiting the eastern horde (1 Swedish Forlorn Hope and 1 Swedish Commanded Shot, 1 Scottish Commanded Shot).
All other Swedish and Scottish forces had to enter from off table. starting on turn 2.

The glorious Swedish and Scottish forces had 2 companies of 18 army points each.
Västgöta Ryttare and Västgöta Regiment, led by Captain Henrik 'the Hammer' af Hunneberg
1 unit Ryttare (Elite Gallopers)
1 unit German Reiters (Trotters)
1 unit Livkompani infantry (Forlorn Hope) -  on table at start
1 unit skrimishing musketeers (Commanded Shot) - on table at start

Mackays Regiment, led by Lieutenant Darrcounter
1 unit pikemen (Pike)
1 unit musketeers (Shot)
1 unit skirmishing musketeers (Commanded Shot) - on table at start
1 unit cavalry (Aggressive Gallopers)
1 unit carabineers (Trotters)

The Polish horde of Cossacks and Flemish on the march.
The dastardly Poles were escorting the precious convoy. The Poles also consisted of 2 companies of 18 army points each. The first company was led by the Cossack Hetman  with 3 units of veteran Cossack light cavalry (Dragoons in game terms).
The second company was the notorious turncoat van Kökkenpanne and his mercenaries. This consisted of 1 unit of curassiers (Elite Trotters) led by van Kökkenpanne himself, 1 unit of pikemen (Pike) and 2 units of musketeers (Shot). One of the musketeer units was handling the wagons.

The Cossacks ride off to guard the flank of the convoy. In the background, van Kökkenpanne's Flemish can be seen  bringing up the convoy.
The first turn saw the Poles and Flemish advance down the road with the Flemish keeping pace with the convoy while the Cossacks raced ahead to engage the small Swedish/Scottish force already present and to secure the flanks.
The main force of Flemish mercenaries advance with the supply convoy.
The small initial Swedish/Scottish force reacted to this by sending the commanded shot units into cover and withdrawing the Forlorn Hope slightly. The intention was to use the commanded shot units to snipe at the advancing enemy from cover and generally delay things while the main force moved up to engage.

Polish Cossacks guard the flank, but suffer casualties from powerful volleys from the Swedish musketeers and cavalry
On the second turn of the game, the Swedish/Scottish main force entered the table. The Scots entered from the opposite short table edge from the Poles and advanced straight down the table using some very nice command dice.
'The Hammer' arrives! The Swedish Västgöta cavalry confront the Cossack flank guard.
The Swedish forces of the Västergötland region entered from one of the long table edges with the intention of harassing and delaying the Poles and Flemish until the Scots main force could join the fray. For once, this plan actually worked ;-)
The Scots advance with banners unfurled and bag pipes playing.
In the centre of the table a firefight broke out between the advancing Flemish Shot and one of the Cossack cavalry units on the one hand and the Swedish and Scots Forlorn Hope and Commanded Shot on the other. At the same time, the Cossack commander (played by Michael's charming young son) detached two Cossack cavalry units to counter the Swedish cavalry theatening the flank of the convoy.
The Cossack Hetman and van Kökkenpanne lead their troops forward. Will they manage to punch through the small Swedish and Scottish advance guard quickly enough?
The initial force of Swedish and Scots Forlorn Hope and Commanded Shot were gradually ground down by the concentrated fire of Flemish Shot and Cossack cavalry. The Flemish and Cossacks did suffer some casualties in this fight but finally managed to rout their opponents. By this time it was too late, however. The Scots main force had managed to advance and completely block the route ahead with fresh forces, while the Swedish cavalry were getting the better of the Cossacks guarding the Polish/Flemish flank.
Charge! Henrik 'the Hammer' and his men ride down the depleted Cossacks.
Eventually, both the Cossack commander's unit was chased away by the Scots carabineers and cavalry while the two Cossack units guarding the flank were routed by the Västgöta cavalry.
This meant that the Flemish were having to fight alone against numerically superior enemies attacking both frontally and from one flank.
At this point a very lucky command die roll by our hero Henrik the Hammer resulted in reinforcements arriving to bolster the Västgöta Company. A veteran Commanded Shot unit joined the fray and quickly rushed into cover in some woods to fire on the embattled Flemish, who were now taking some very heavy casualties.
The Västgöta cavalry led by Henrik 'the Hammer' menace the flank of the Flemish. van Kökkenpanne is vainly trying to counter the threat by leading his personal guard of curassiers to face the Swedes.
The Curassier guard of the notorious van Kökkenpanne rushed to cover the flank threatened by by the Swedish cavalry and musketeers skirmishers, but was met by a number of devastating volleys and charges which rapidly forced even this elite unit to retreat in disarray with very few surviviors. At the same time, a combination of fire and impetuous cavalry charges by the Scots routed the Flemish musketeers bringing up the convoy while the Flemish pikemen were also forced back.
The end. Västgöta cavalry and musketeers assault the flank as the Scots drive home the final frontal assault, forcing the Flemish to flee.

At this point the few remaining Flemish decided to retreat and the game was over.
So, in the end it was a glorious win for the Swedes and Scots with some more Honour points gained by the victors, bringing both commanders nearer to another promotion.
And, of course, the contents (beef and beer!) of the convoy will be enjoyed in the Swedish and Scottish camps.
The Cossacks and Flemish will be plotting vengeance, of course.....

Sunday, March 13, 2016

AAR, Black Powder, The battle of Fort Donelson February 15th, 1862


ACW, The battle of Fort Donelson February 15th 1862 AAR

Out of a whim I bought a Ironclad model from A company called Sarissa. The scale was 1/56. A nice piece made out of precision cut MDF. What do you next, when you built the model. In my case it took a while to figure out. Finally I decided to do something about it and wrote scenario for the game rules  Black Powder. I intended to create scenario in which I would use the this particular model. I scanned my sources and found a suitable battle. I found it in a scenario book that I bought as a pdf online. The scenario book was "Rebell Yeall- Yankee Hurrah" by George Anderson and Ryan Toews.
The Ironclad 

Union troops advancing towards the battle line

The River

The particular battle I decided upon was the battle of Fort Donelson 1862. It was a battle in the American civil war that featured both land troops as well as Ironclads. The battle is one of the battles which elevated Ulysses Grant to fame and fortune. It took place around a confederate fort in Tennessee that was supposed to protect the Cumberland River from a Yankee invasion. The fort fell as consequence of this battle and in the process so did a vital part of Tennessee. It was a major confederate setback.

The battle itself consisted of to major clashes. One in the morning of the 15th. The confederate a tried to make a breakthrough. They more or less succeed in breaking the Union line, but some bad decisions from the confederate commanders led to the halt of the confederate breakthrough, and the confederates returned to their original position within the fortifications surrounding the fort. The second part took place during the afternoon when the Unions forces decided to assault the fortification from the landside. The second attack led to irreparable damages to the southern morale. Furthermore the fort was by now once more encircled and back under siege conditions. This led to the eventual surrender of confederate forces the day after the attack. Much of the confederate failings in all this was put on the inept cofederate generals Floyd and Pillow. These two gentlemen ordered the confederate retreat back to the fort as well as boasting out a victory the evening after the battle, despite the obvious defeat.

The game itself was played using three standard gaming tables( 3 6ftx4ft tables). One of the tables was covered by river terrain. The one in the middle was covered by the field fortifications of the fort and the last one the area just south of the fort. The tables were connected together.

I could not use the orginal scenario in the scenario booklet since it had to be adapted to Black Powder and the restrictions given to use when it came to miniatures and space. The players commanded roughly one or two brigades each. Each brigade consisted roughly of 3 regiments. This does not really corespondent to the regiments present at the actual battle. Often in Acw battles the regiments have been grinder down to fragments of their orginal intended size and thus I often tend to merge units together in game scenarios. The main reason is to keep it all playable in this scale.  I had set the number of turns to 15. This proved to be unnecessary since the game was decided by turn 8. The main victory condition was that victory would be decided upon who was in charge of the outer defenses by the end of the game.
The Union side started the game by advancing their main force towards outer defenses. The Union would eventually gain a number of reinforcements, but they had the bulk of their force fielded at the start of the game. The southern side had only a few units within the fort when the game begins. This is due to the fact that most of the confederate units had just been ordered to fall back to the fart following their breakthrough attempt earlier that day. In game terms this means that the Confederates arrive piecemeal on the battle field. This will give the Union players a few turns in which they can rush forth troops to get a superiority in numbers that will enable them to storm the confederate fortifications. If the Union side is stalled or u decisive the Confederates will shore up the defenses with newly arrived troops.

How did our game evolve?

Well, the Union advance without hesitation towards the outer defenses, while the confederate soldiers did have some initial difficulties to get their troops back behind the trenches( the confederate players failed a number of command rolls, which delayed the arrival of some of their units). The Union side headed strait toward a part of the defenses that lacked a defending unit, apart for one single unit. A quick assault follows and the Union side had a number of units on other side of the outer defenses.
The confederates finally managed to get their main force on the table. Their main stratagem was to face the Union forces in their weaker left flank outside the defenses. This was sound judgement so far that they're outnumbered their enemy. However there was flaw in this scheme. This meant that they could not send enough troops to oust the Union breakthrough. Only a few units were available in the critical moment when the Union side started to pour in troops in the breech they had created. The single confederate brigade defending the works was soon broken while the Cofederates on the flak of the Union troops got nowhere.  By round 8 it was more or less over since no confederate troops inside the fort was available to defend the fort and the units outside the fort was locked up in struggle
that was stalling.
The starting positions. The Rebels will be reinforced from the road leading into the fort

The inner part of the fort


Union troops have just broken through the confederate defences

Union troops inside the first line of fortifications

Rebel troops tries in vain to dislodge the Union troops inside the fort

The field hospital

The Victorious Union general trying to be social withe the locals....

What about the Ironclad?

The Ironclad was given the task to first knock out the Rebel heavy guns defending the fort from the riverside. If the Ironclad bombardment would be succesful and the heavy artillery of the fort knocked out then the Ironclad could support the attack on the fort by bombarding the confederate units within the fort.
The scenario rules for the river engagement was written so that the closer the Ironclad would come to the fort the easier it would be to hit it. However if the Ironclad would come close enough it would be able to bombard the confederate land forces.
The Ironclad and shore batteries fired upon each other and both sides scored some hits. It was the confederate batteries that was knocked out first. By the time the river battle was over it had little consequence for the outcome since the Union forces had already dispatched most confederates within the fort.

The River batteries firing at the Ironclad. The batteries are hit as well

The duel between the Ironclad and the River batteries

Shots comming closer to the Ironclad

The Ironclad is taking a hit....


Was it a working scenario?

The players though so. From the description of it all it may seem to be a bit onesided, but I would say that the their are quite a few things that speaks I favor of the defending side. They have acces to the field works. The confederate players choose to put it all one one card - the flanking movement. It could have worked, but tat would have demanded that the few units inside the fort could have hold out a few turns more. Maybe a bit of luck would have changed that part of the game.

The pictures that took during this game was of rather poor quality compared to the ones taken by the players( I took part as referee). I do apologize for that. I suggest you check out the following blogs were the players covered the battle from their perpective. (...and the pictures are much better):

http://wargameinsvergie.blogspot.se/2016/03/black-powder-rules-battle-of-fort.html

http://latenightpainting.blogspot.se/2016/03/battle-report-black-powder-battle-of.html

http://latenightpainting.blogspot.se/2016/03/battle-report-black-powder-battle-of.html