
I have completed a few more buildings for my Trondheim project. The basic idea is to create buildings that will fit into a snowy Scandinavian enviroment. All buildings are built for 28mm miniatures. The basic design is of a generic Nordic kind. The same type of buildings can be found all over Scandinavia, especially the mid/Northen part of this region. The only exception is Denmark and the southermost part of Sweden(Scania), since those areas lacked suffcient sources of timber. One can also see similair wooden structures in parts of Russia and North America. My project has a focus on historical events that took place around 1718, but the same terrain pieces can be used for earlier as well as later periods. In this blog entry I will show off the first building of this new batch.
Here is a step by step description on how I built the timbered cottage you can see above.....
The first step....
First a made a base on which to start to start making the basic structure. The base was made out of foam core. The timber was cut and placed in a similair fashion as when building a full sized timber building. The main challenge is to place the groves on the individual timber logs. There has to be certain degree of precision, otherwise the whole structure will become scewed. I began using sticks made out hard pine wood. This was a mistake. Cutting the groves proved to be a rather arduous task. The solution was to use soft balsa wood. My building is built out of balsa and pine wood, though do recommend you all to use balsa wood, unless you own a Dremel tool or something similar.

Cutting the individual pieces of timber is quite important. This was the trickiest part of this project. Use soft wood like balsa wood to create the timber.
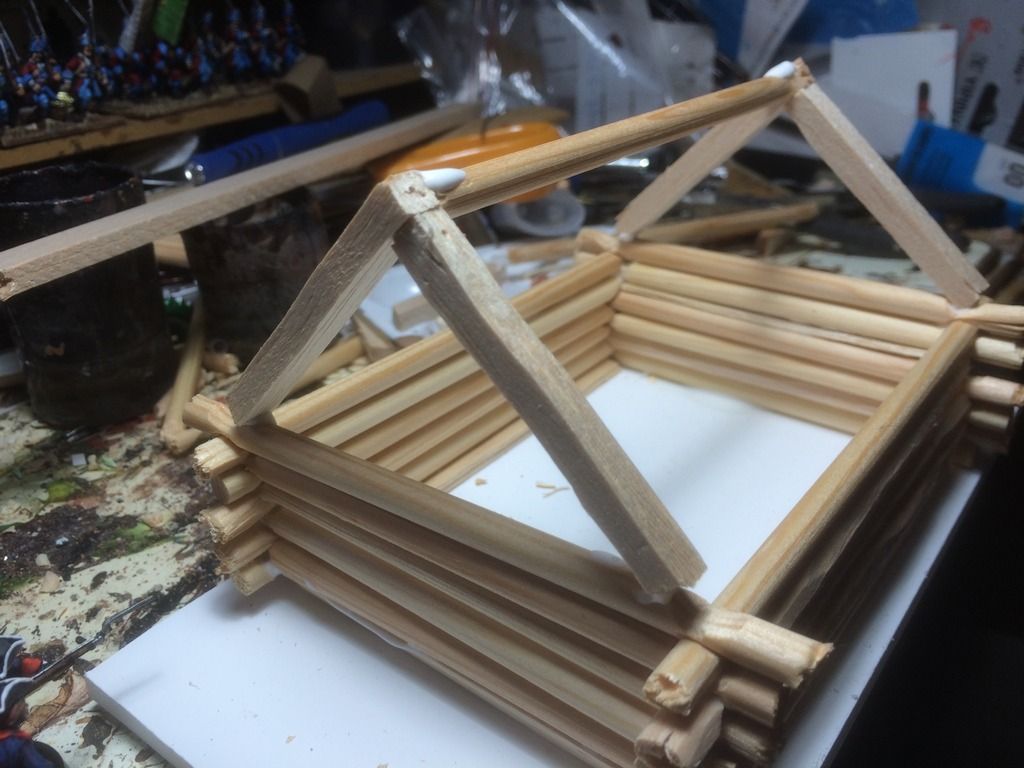

The underlying roof structure was made out of wooden spatulas.

The Windows and the door was made out of balsa wood and plastic bases found in a
box of Warlord plastic miniatures.

The chimney was made out of foam core. It was covered by tissue paper and model railway gravel.

An old bath towel serves a new purpose...
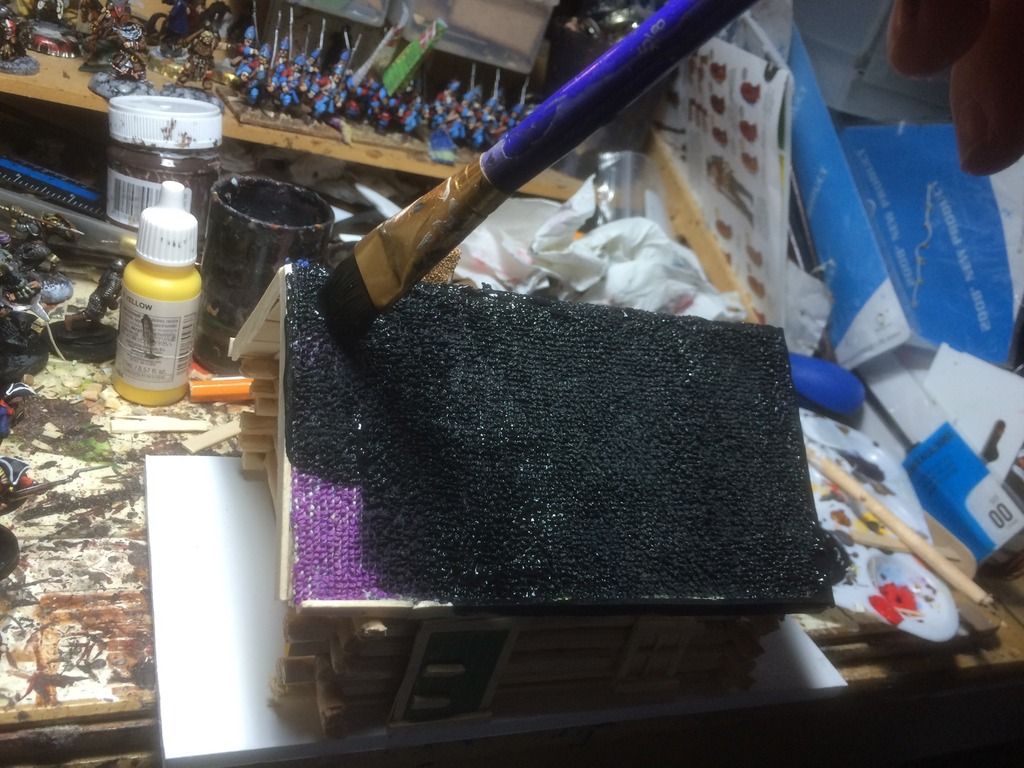
The first layer of black coat. It is very important that every spot on the basic structure is covered by black base coat. If not then the unpainted spots will shine through. The next layer will be dry brushed green. Finally three shades of grey will be added. The cottage is now ready for summer use. However this is supposed to be a piece in a winter scenery. A layer of dry brushed white and snow flock will be added last.

Exellent work matey !!!
ReplyDeleteThank you Micke!
DeleteReally impressive work - the green color coating under the grey is a brilliant touch. Adds a lot os mossy weathering to the beams.
ReplyDeleteWell, I usually apply a layer of green after the first layer of black when paining a wooden structure. Aging natural wood tend to be covered by moss and lichen. This especially visible on real life unpainted buildings. It should be noted that the green layer should only be hinted, thus the dry brushing......and the brush should be very dry indeed.
DeleteThank you Ray!
ReplyDeleteExcellent work. Very atmospheric.
ReplyDeleteThank you Paul!
DeleteGood work, and useful. I have looked for tips for creating cottages like this one for quite a while...
ReplyDeleteI am glad you found it useful! :) There a few instructions presented now and then on the web. Most of them are quite good. However the colours are often a bit wrong. Brown wood is actually not that common when comes to timbered buildings. Grey is more common as the wood ages.
DeleteAtmospheric and beautiful, great details...
ReplyDeleteThank you Phil! :)
DeleteA super cool and successful in coloring
ReplyDeleteIt is just like a genuine, forest-cottage
Thank you Sir!
Delete