
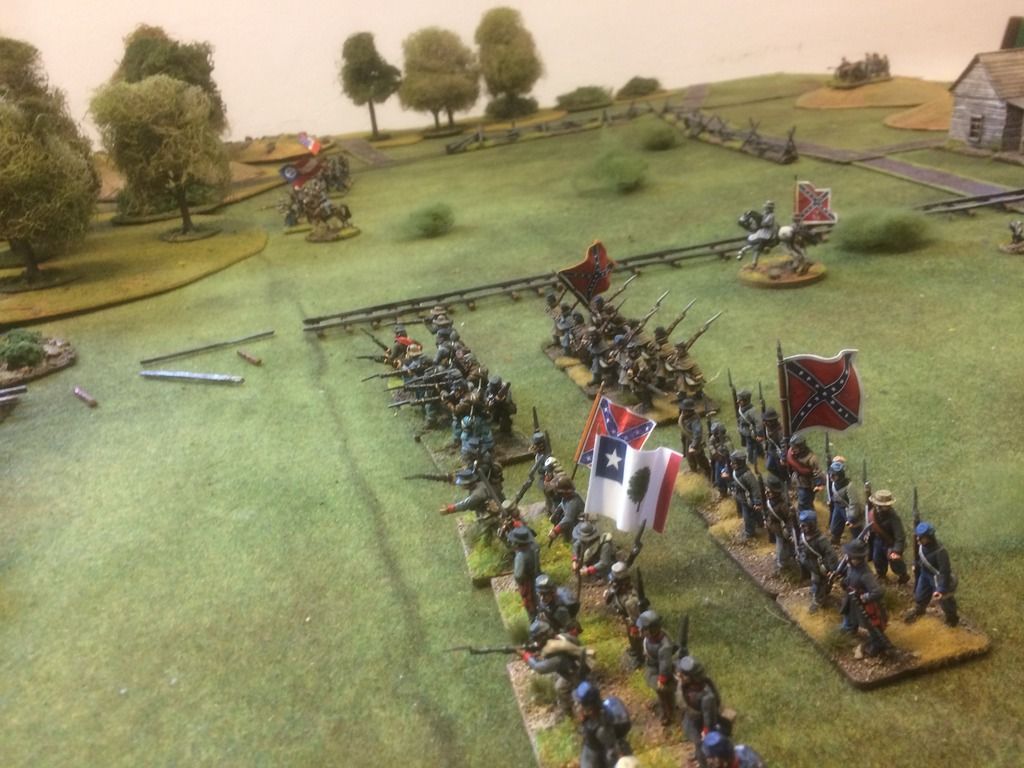
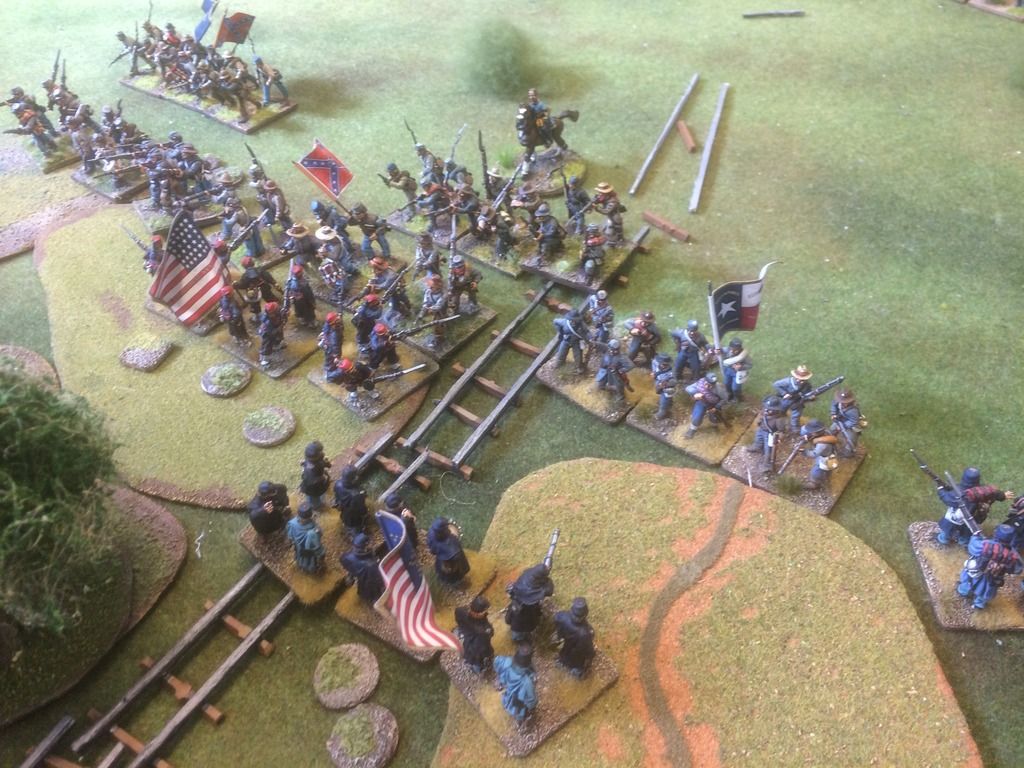
Forno´s Brigade moving along the broken up railroad. Bristoe Station is in the background
The Little Wars Stockholm Wargaming Club held a club meeting last Saturday. During this meeting We ran a session of Black Powder. The scenario picked for this occassion was the battle of Kettle Run, a battle that took place during the American Civil War. The rules used was as mentioned Black Powder, and We also used the supplement Glory Hallelujah.
In this report I will give you the full stats of the game. As always building a scenario for a wargame demands certain compromises when it comes to playability vs historical facts. The main main is to build something that the players enjoy playing. My main resource for building this scenario is the Scenario boklet "Across Deadly Space" by George Anderson and Ryan Toews. It has been published by Potomac Publication and sold as a PDF on the Wargamers Vault webpage. Some data, especially the ones concering the commanders, has been gathered from a number of sources and might be a arbitrary, but I do think they capture at least a part of the personality behind the commander in question.
In the final part of this report you will find a a short description how the game was played and a few notes regarding the historical outcome.
The historical background
The battle took place after Mclellans failed Peninsular Campaign. General John Pope had been
appointed CinC for the so called Army of Virginia. McClellan was out of the picture, at least for the
moment. Pope wasn't a modest character, and he boasted that he had the skills necessary to bring war to a descisive victory. His ambitious plans would eventually lead to yet another Northen disaster in the Eastern theatre, the battle of Second Manassas.
The battle of Kettle Run was initiated on the 27 of August 1862. Stonewall Jackson had been raiding Union depots around Manassas. To protect his main force at Manassas he had posted 3 brigades with Major general Richard Ewell near Brisoe Station. A Union force lead by Joseph's Hooker closed in on Ewell's force and the Union and Cofederate forces clashed near Bristoe Station. The Union forces were larger than the Confederate ones. Ewell faced a dilemma. If h stayed than he risked getting a sound beating the Union force. If he withdrew he would no longer protect Stonewall Jacksson's main force.
The objective of this scenario
The Uinion forces will try to force the Confederate forces out of their positions in the two major wooded areas in front of Bristoe Station. If the Union manage to drive out the Confederates out of first of the two wooded areas then it will be minor Union victory. If the Union capture bothe wooded areas then it will be a major Union victory. All other results will be Confederate victory.
The Union will make the first move. The scenario last 10 rounds, with a possible prolongation with two rounds. When reaching round 10 the Union player rolls a d6. If the result is 1-2 the game ends. After round 11 one rolls the die ones more. If the result is 1-3 the game ends. The side that has taken least losses can add +1 to the result if they so chooses.
Deployment
The units are deployed according to the map below


Union units are blue and Confederate units are grey. Objective 1 is referred to the text as "the western woods. Objective 2 is referred to as the eastern woods. To win a major victory in the game the Union player must capture both objectives. If the Union player only capture objective number 1 then it is a minor Union Victory. The map is based upon the map of Kettle Creek found in "Across a Deadly Space"

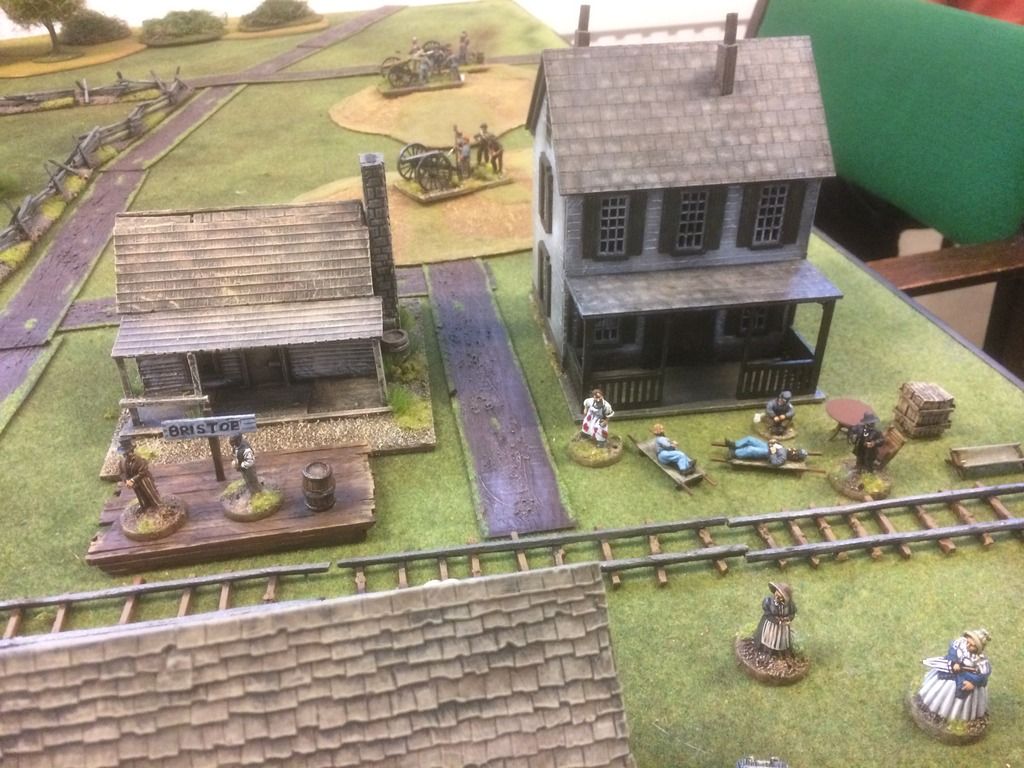
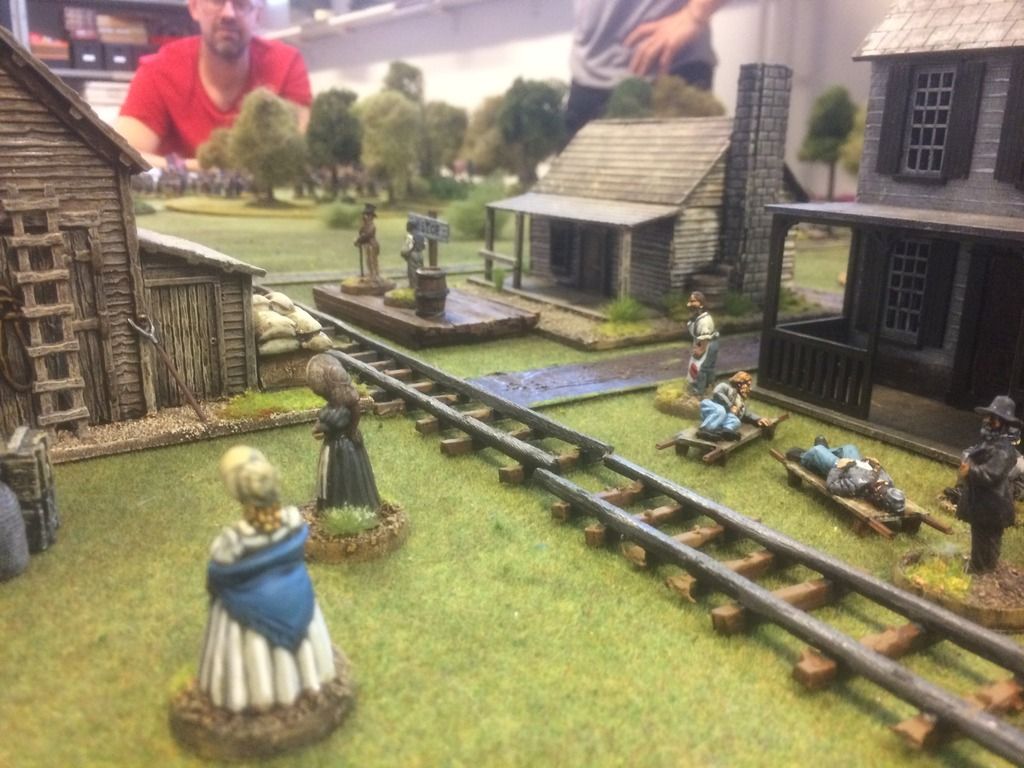
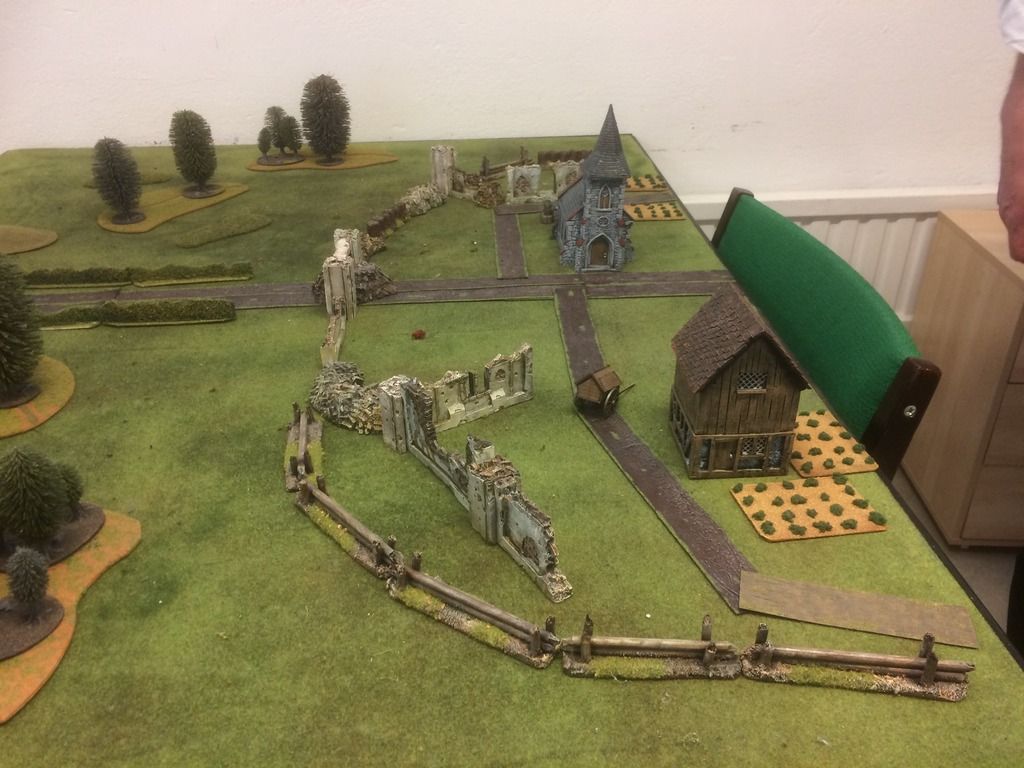
Bristoe Station


A few other shots from Bristoe Station

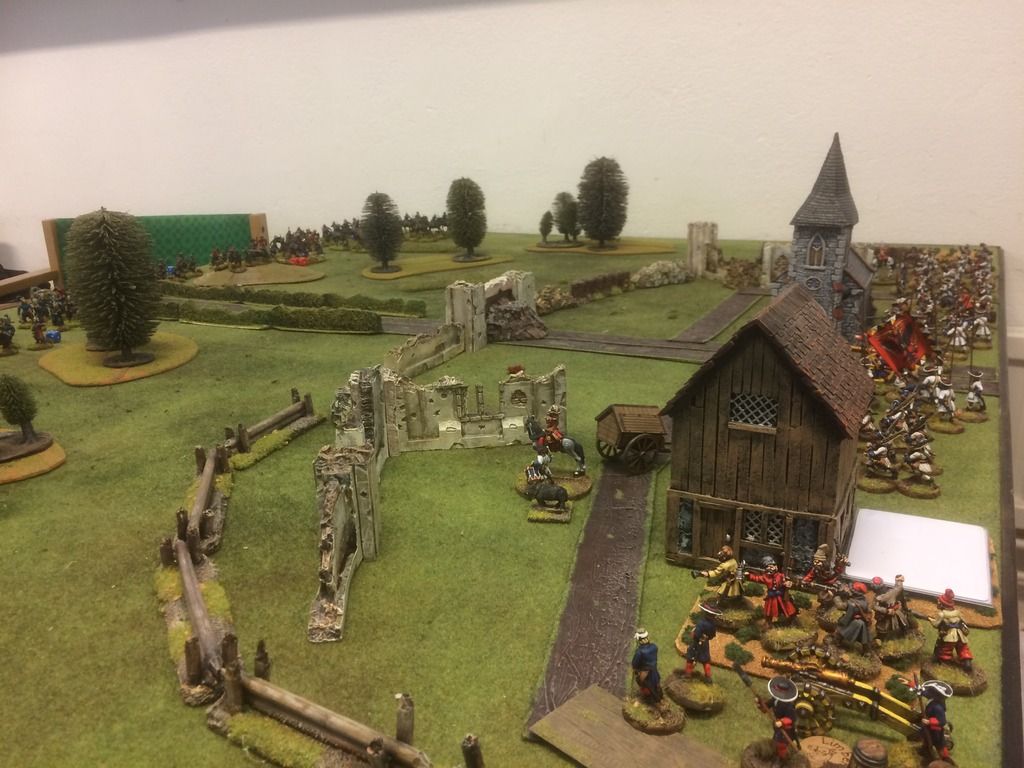
Confederate Artillery positioned on the partially wooded hill just south of Bristoe Station

Lawton´s Brigade positioned just in front of the battery above
The Southerners all start on the field. The Union 3rd brigade also starts on the field. The first `Union brigade enters on turn one by mobile deployment( they arrive on the field if the brigade commander rolls a successful brigade order) somewhere along the western Edberg of the battlefield. The second brigade(the Excelcior Brigade) arrive on round three, so where along the western edge of the board. The Union artillery is split between the Excelsior and the 3rd brigade(the Union player choose how to divide the artillery).
Terrain
All slopes are open terrain. All wooded areas are tough terrain and units can only move at half movement rate.
ORDER OF BATTLE
Notes regarding the stats
For those of you that are not familiar with Black Powder I first want to give you an idea what the stats mean. It can be useful if you wish to try the scenario and convert it to another set of rules. In game Black Powder you basically play with units that are large, Normal, small or tiny.
Large units have:
Hth 8 Shot 4 Morale 4 Stamina 4
Normal units:
Hth 6 Shot 3 Morale 4 Stamina 3
Small units:
Hth 4 Shot 2 Morale 4 Stamina 2 Rifled Musket
Tiny units were not used in this game at all.
UNION
Second Division, Third Army Corps
Maj. Gen. Joseph Hooker, average, 8, Aggressive
First Brigade
Brig. Gen. Cuvier Grover, average, 8, Decisive
1st Mass.
Hth 6 Shot 3 Morale 4 Stamina 3 Rifled Musket, Uptity , First Fire
11th Mass.
Hth 6 Shot 3 Morale 4 Stamina 3 Smoothbore Musket, Uptity , Pour it on, First Fire
16th Mass.
Hth 6 Shot 3 Morale 4 Stamina 3, Rifled Musket, Uptity, First Fire
2nd N.H.
Hth 6 Shot 3 Morale 4 Stamina 3, Rifled Musket, Uptity, First Fire
26th Pa.
Hth 6 Shot 3 Morale 4 Stamina 3 Rifled Musket, Uptity, First Fire
Second (Exelsior) Brigade
Col. Nelson Taylor, average, 8
70th N.Y.
Hth 6 Shot 3 Morale 4 Stamina 3 Rifled Musket, Uptity, First Fire
71st N.Y.
Hth 6 Shot 3 Morale 4 Stamina 3 Rifled Musket, Uptity, First Fire
72th N.Y.
Hth 6 Shot 3 Morale 4 Stamina 3 Rifled Musket, Uptity, First Fire
73th N.Y.
Hth 4 Shot 2 Morale 4 Stamina 2, Rifled Musket, Uptity, First Fire
74th N.Y.
Hth 6 Shot 3 Morale 4 Stamina 3, Rifled Musket, Uptity, First Fire
Third Brigade
Col. Joseph B. Carr, average, 8, Head Strong
5th N.J.
Hth 6 Shot 3 Morale 4 Stamina 3, Rifled Musket, Uptity, First Fire
6th N.J.
Hth 6 Shot 3 Morale 4 Stamina 3, Rifled Musket, Uptity, First Fire
7th N.J.
Hth 6 Shot 3 Morale 4 Stamina 3, Rifled Musket, Uptity, First Fire
8th N.J.
Hth 6 Shot 3 Morale 4 Stamina 3, Rifled Musket, Uptity, First Fire
2nd N.Y.
Hth 6 Shot 3 Morale 4 Stamina 3, Smoothbore Musket, Uptity, Pour it on, First Fire
115th Pa.
Hth 6 Shot 3 Morale 4 Stamina 3, Rifled Musket, Untested, Uptity, First Fire
Attached artillery
D, Pa. Lt. Art. - 2 Rifled cannons
E, 1st R.I. - 2 Smoothboore cannons
E, 4th U.S. - 2 Rifled cannons, elite
CONFEDERATE
Ewell's Division
Maj. Gen. Richard S. Ewell, superior, 9, Timid, Low Independance
A gaming note: Ewell is not normally a timid commander, nor did he lack initiative and aggressiveness, but in this battle he seemed to be rather nervous about his army's predicament and he was working hard to get Lee´s approval to withdraw. He was also man dependent upon clear and specific instructions. In this case he seems to lack such instructions.
Early's Brigade
Brig. Gen. Jubal A. Early, superior, 8, Head Strong
13th Va.
Hth 6 Shot 3 Morale 4 Stamina 3 Smoothbore Musket, Rebel Yell, First Fire
25th Va.
Hth 6 Shot 3 Morale 4 Stamina 3 Smoothbore Musket, Rebel Yell, Pour it on, First Fire
31st Va.
Hth 6 Shot 3 Morale 4 Stamina 3 Rifled Musket, Rebel Yell, First Fire
44th Va.
Hth 6 Shot 3 Morale 4 Stamina 3 Smoothbore Musket, Rebel Yell, Pour it on, First Fire
49th Va.
Hth 6 Shot 3 Morale 4 Stamina 3 Rifled Musket, Rebel Yell, First Fire
52nd Va.
Hth 4 Shot 2 Morale 4 Stamina 2 Smoothbore Musket, Rebel Yell, Pour it on, First Fire
58th Va.
Hth 6 Shot 3 Morale 4 Stamina 3 Rifled Musket, Rebel Yell, First Fire
Hay's Brigade
Col. Henry Forno, average, 8
5th La.
Hth 6 Shot 3 Morale 4 Stamina 3 Smoothbore Musket, Rebel Yell, Pour it on, First Fire
6th La.
Hth 6 Shot 3 Morale 4 Stamina 3 Smoothbore Musket, Rebel Yell, Pour it on, First Fire
7th La.
Hth 6 Shot 3 Morale 4 Stamina 3 Smoothbore Musket, Rebel Yell, Pour it on, First Fire
8th La.
Hth 6 Shot 3 Morale 4 Stamina 3 Smoothbore Musket, Rebel Yell, Pour it on, First Fire
14th La.
Hth 6 Shot 3 Morale 4 Stamina 3 Smoothbore Musket, Rebel Yell, Pour it on, First Fire
Lawton's Brigade
Brig. Gen. Alexander R. Lawton, average,8
13th Ga.
Hth 8 Shot 4 Morale 4 Stamina 4 Rifled Musket, Rebel Yell, First Fire
26th Ga.
Hth 6 Shot 3 Morale 4 Stamina 3 Rifled Musket, Rebel Yell, First Fire
38th Ga.
Hth 6 Shot 3 Morale 4 Stamina 3 Rifled Musket, Rebel Yell, First Fire
61th Ga.
Hth 6 Shot 3 Morale 4 Stamina 3 Rifled Musket, Rebel Yell, First Fire
Artillery
Brown's Md. Bty. - 1 light smootbore cannon
Latimer's Va. Bty - 1 smoothbore cannon
D'Aquin's La. Bty. - 1 Rifled canon
Dement's Md. Bty. - 1 Smothbore cannon
Johnson's Va. Bty. - 1 light Smoothbore cannon
Balthis' Va. Bty. -1 light Smoothbore cannon
The game
In our game the Union was handled by my two Miniature Mayhem compatriots Ulf and Pål. Facing them(and posing as Cofederates) was Michael, Søren and Andy. On the side cheering whomever he felt needed it we had another Michael aka Dalauppror.
Just like Joe Hooker the Union side started out with a major assault on the Cofederate lines in the western wooded area. The Confederates took a massive beating, but somehow they held their ground.


The intial Union assult on the Confederate lines around the wooded area to the west(Objective 1)
Jubal Early(Søren) kept his position at the wooded area to the east. Forno(Michael) moved in all his units into the western woods. Lawton(Andy) followed suit.
As the first Union assault stalled the second Union wave moved in. The Excelsior brigade ignored the battle in the western woods and moved towards Jubal Early's brigade.To counter this Jubal Early's brigade then started to move up some of his units along the flank of the Excelsior brigade. This eventually proved to be a crucial move.
The battle turn into a situation were the brigades of Forno and Lawton was facing the bulk of the Union forces. For quite some time it looked as if the Union forces would break through Forno's brigade. If that would have happened the Confederates would have been flanked and the Union would at least have won a minor victory. Forno's brigade took quite a lot of casualties.

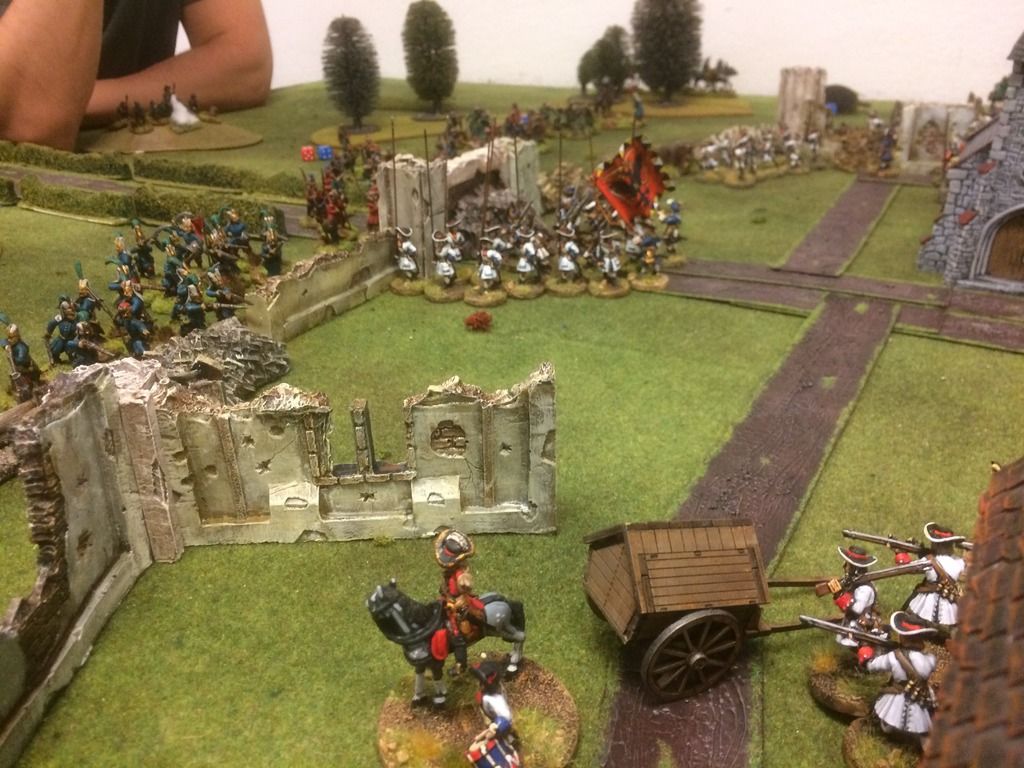
 Lawton´s Brigade is moving up to strengthen the line behind Forno´s depleted units. Bristoe Station is in the background


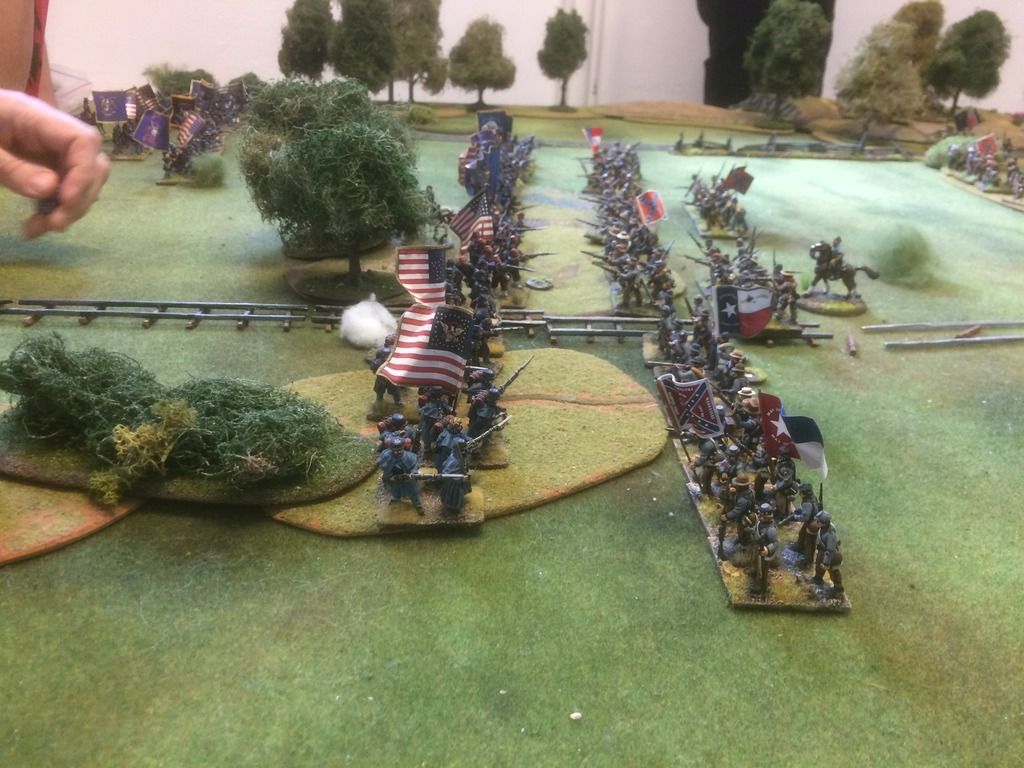
The Excelsior Brigade is moving in - this is the second Union attack wave against the first objective

The Excelsior Brigade is slugging it out in the Woods. The trees have been removed in order to make the situation playable.

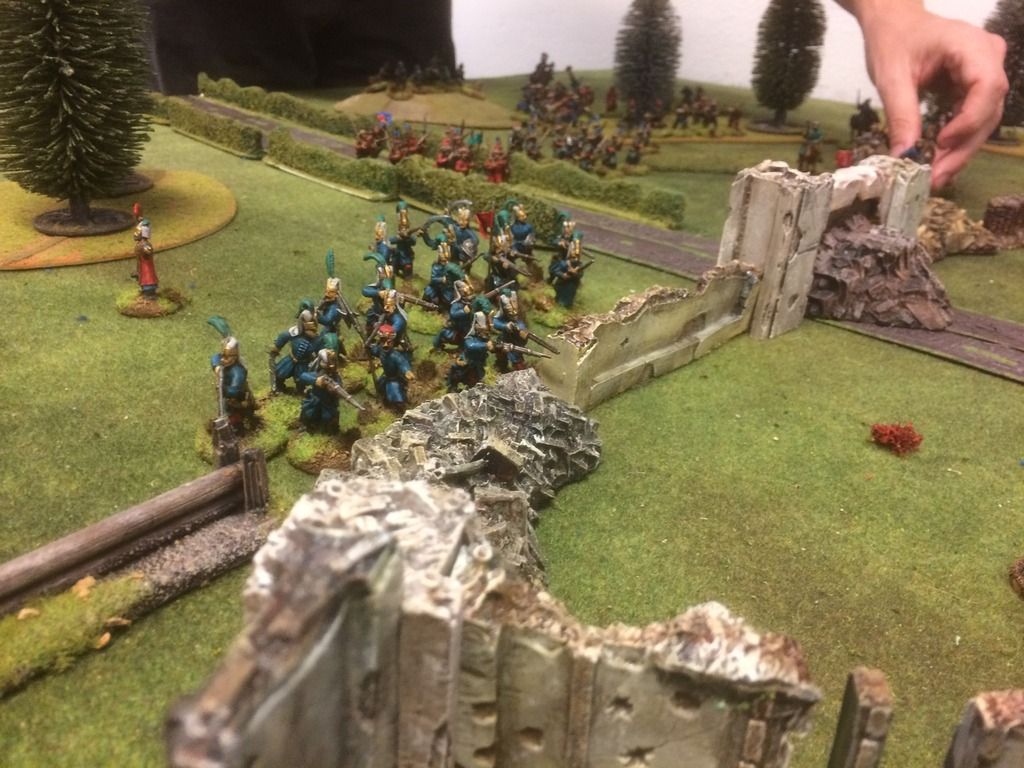
Another shot of the previous situation. Please note that one Union unit is about to flank the southern edge of the Confederate line. If this attack would have succesful, and if Lawton´s Brigade hadn´t arrived in time this would have led to a Confederate disaster.


The Height of the Battle, in this situation all was in the balance, though if looking carefully to top of the picture one can see Confederates moving up on the Left flank of the Union line. This would be the thing that tipped the balance.
The Excelcior brigade moved up a fairly large battery of artillery along the road leading towards the eastern wood and the second objective. Somewhere near the wooded hill in the northern part of the battlefield they encounter several Confederate units. This was a risky situation for both parts. Getting pounded by the battery would lead to a fire storm with the Union player throwing dices against any single unit nearby. Storming the battery straight on was not an option. However the Confederate player choose to sacrifice a unit in order to let others sneak past the battery. After all the battery could not reach units moving in the woods. Eventually a unit managed to open fire on the battery from the flank. The battery was now easy prey. With the loss of the battery all chances for a continued Union advance was gone. The game was over and the Union had lost this battle.


We had quite a large gameboard, but most the gaming took place on just half of it.

The Situation towards the end of the game. The Union now has quite a lot of artillry close to the Confederate line.

The move that ended the game
The historical outcome
In the historical battle the Union did seriously threaten the Confederate positions in the two wooded areas. Eventually Ewell got the approaval to start a withdrawal. Using the final hours of the day the Confederates left the field to the Union. If this was a true victory might be a bit unclear. The battle did not lead to any strategic victories and the whole campaign was decided by the battle of second Manassas, which was a Confederate victory.


