Monday, March 28, 2016

Danish/Scanian Leidang and Hird, Foteviken 1134

The Scanian Hird, these are the really tough guys. They had weapon and armor that was quite up to date( or so I assume)

As some of you might know I was recruited by Michael(Dalauppror) to help him out with a gaming project that will be displayed at Salute this year. The project has been called Project F. The project covers the battle of Foteviken 1134. It took place in present day Scania in southern Sweden, but back then this was part of Denmark. The battle was more or less a part of Danish civil war. Details about the battle , the rules used and the demo game that will run at Salute can be found on the Dalauppror blog. 

I have created a piece of Scenery for this project( a church) and I have now completed some units as well. I was supposed to paint 4 Leidang units(foot levy)and one Hird( the retinue of a king or a higher noble). As bonus I painted up some skirmishers as well.

Below you see some examples of what I painted. It is three Leidang units and a small unit of skirmishers. The minis are a wild mix of what I had in my bit box and a box of plastic minis from Conquest miniatures. The Scandinavians had left the Viking era by the time this battle took place, but the weapons and armor used was probably a sort of mix of old Viking and this a bit more modern for it's day.

The Leidang was basically armed peasants, a levy called upon when the King needed to wage war. Not necessarily just for defensive tasks.


Leidang number 2. Quite few of these peasants seems to be quite well off. They have chain mail and proper weapons.


Leidang number 3

The skirmishers, the guys withe missile weapons.


Saturday, March 19, 2016

The 'Hammer' Strikes Again


Earlier this week we played another thoroughly enjoyable game of Pikeman's Lament, part of our ongoing campaign setting of the Swedish Polish War of 1625-1629.
This time we played a mission called 'Beef on the Hoof' in which one side is escorting a convoy of wagons and livestock across the table. The opponent's task is to chase off the escort and take control of the convoy with all the goodies.
This is certainly historical as all armies suffered from chronic supply difficulties and the supply convoys were absolutely essential.
An overview of the battle, background and some very nice photos can be found on Dalauppror's blog
The Swedish and Scots advance guard await the arrival of the Poles and Flemish. Will they be able to hold off the enemy long enough?
In the centre of the table a small Swedish/Scottish force was awaiting the eastern horde (1 Swedish Forlorn Hope and 1 Swedish Commanded Shot, 1 Scottish Commanded Shot).
All other Swedish and Scottish forces had to enter from off table. starting on turn 2.

The glorious Swedish and Scottish forces had 2 companies of 18 army points each.
Västgöta Ryttare and Västgöta Regiment, led by Captain Henrik 'the Hammer' af Hunneberg
1 unit Ryttare (Elite Gallopers)
1 unit German Reiters (Trotters)
1 unit Livkompani infantry (Forlorn Hope) -  on table at start
1 unit skrimishing musketeers (Commanded Shot) - on table at start

Mackays Regiment, led by Lieutenant Darrcounter
1 unit pikemen (Pike)
1 unit musketeers (Shot)
1 unit skirmishing musketeers (Commanded Shot) - on table at start
1 unit cavalry (Aggressive Gallopers)
1 unit carabineers (Trotters)

The Polish horde of Cossacks and Flemish on the march.
The dastardly Poles were escorting the precious convoy. The Poles also consisted of 2 companies of 18 army points each. The first company was led by the Cossack Hetman  with 3 units of veteran Cossack light cavalry (Dragoons in game terms).
The second company was the notorious turncoat van Kökkenpanne and his mercenaries. This consisted of 1 unit of curassiers (Elite Trotters) led by van Kökkenpanne himself, 1 unit of pikemen (Pike) and 2 units of musketeers (Shot). One of the musketeer units was handling the wagons.

The Cossacks ride off to guard the flank of the convoy. In the background, van Kökkenpanne's Flemish can be seen  bringing up the convoy.
The first turn saw the Poles and Flemish advance down the road with the Flemish keeping pace with the convoy while the Cossacks raced ahead to engage the small Swedish/Scottish force already present and to secure the flanks.
The main force of Flemish mercenaries advance with the supply convoy.
The small initial Swedish/Scottish force reacted to this by sending the commanded shot units into cover and withdrawing the Forlorn Hope slightly. The intention was to use the commanded shot units to snipe at the advancing enemy from cover and generally delay things while the main force moved up to engage.

Polish Cossacks guard the flank, but suffer casualties from powerful volleys from the Swedish musketeers and cavalry
On the second turn of the game, the Swedish/Scottish main force entered the table. The Scots entered from the opposite short table edge from the Poles and advanced straight down the table using some very nice command dice.
'The Hammer' arrives! The Swedish Västgöta cavalry confront the Cossack flank guard.
The Swedish forces of the Västergötland region entered from one of the long table edges with the intention of harassing and delaying the Poles and Flemish until the Scots main force could join the fray. For once, this plan actually worked ;-)
The Scots advance with banners unfurled and bag pipes playing.
In the centre of the table a firefight broke out between the advancing Flemish Shot and one of the Cossack cavalry units on the one hand and the Swedish and Scots Forlorn Hope and Commanded Shot on the other. At the same time, the Cossack commander (played by Michael's charming young son) detached two Cossack cavalry units to counter the Swedish cavalry theatening the flank of the convoy.
The Cossack Hetman and van Kökkenpanne lead their troops forward. Will they manage to punch through the small Swedish and Scottish advance guard quickly enough?
The initial force of Swedish and Scots Forlorn Hope and Commanded Shot were gradually ground down by the concentrated fire of Flemish Shot and Cossack cavalry. The Flemish and Cossacks did suffer some casualties in this fight but finally managed to rout their opponents. By this time it was too late, however. The Scots main force had managed to advance and completely block the route ahead with fresh forces, while the Swedish cavalry were getting the better of the Cossacks guarding the Polish/Flemish flank.
Charge! Henrik 'the Hammer' and his men ride down the depleted Cossacks.
Eventually, both the Cossack commander's unit was chased away by the Scots carabineers and cavalry while the two Cossack units guarding the flank were routed by the Västgöta cavalry.
This meant that the Flemish were having to fight alone against numerically superior enemies attacking both frontally and from one flank.
At this point a very lucky command die roll by our hero Henrik the Hammer resulted in reinforcements arriving to bolster the Västgöta Company. A veteran Commanded Shot unit joined the fray and quickly rushed into cover in some woods to fire on the embattled Flemish, who were now taking some very heavy casualties.
The Västgöta cavalry led by Henrik 'the Hammer' menace the flank of the Flemish. van Kökkenpanne is vainly trying to counter the threat by leading his personal guard of curassiers to face the Swedes.
The Curassier guard of the notorious van Kökkenpanne rushed to cover the flank threatened by by the Swedish cavalry and musketeers skirmishers, but was met by a number of devastating volleys and charges which rapidly forced even this elite unit to retreat in disarray with very few surviviors. At the same time, a combination of fire and impetuous cavalry charges by the Scots routed the Flemish musketeers bringing up the convoy while the Flemish pikemen were also forced back.
The end. Västgöta cavalry and musketeers assault the flank as the Scots drive home the final frontal assault, forcing the Flemish to flee.

At this point the few remaining Flemish decided to retreat and the game was over.
So, in the end it was a glorious win for the Swedes and Scots with some more Honour points gained by the victors, bringing both commanders nearer to another promotion.
And, of course, the contents (beef and beer!) of the convoy will be enjoyed in the Swedish and Scottish camps.
The Cossacks and Flemish will be plotting vengeance, of course.....

Sunday, March 13, 2016

AAR, Black Powder, The battle of Fort Donelson February 15th, 1862


ACW, The battle of Fort Donelson February 15th 1862 AAR

Out of a whim I bought a Ironclad model from A company called Sarissa. The scale was 1/56. A nice piece made out of precision cut MDF. What do you next, when you built the model. In my case it took a while to figure out. Finally I decided to do something about it and wrote scenario for the game rules  Black Powder. I intended to create scenario in which I would use the this particular model. I scanned my sources and found a suitable battle. I found it in a scenario book that I bought as a pdf online. The scenario book was "Rebell Yeall- Yankee Hurrah" by George Anderson and Ryan Toews.
The Ironclad 

Union troops advancing towards the battle line

The River

The particular battle I decided upon was the battle of Fort Donelson 1862. It was a battle in the American civil war that featured both land troops as well as Ironclads. The battle is one of the battles which elevated Ulysses Grant to fame and fortune. It took place around a confederate fort in Tennessee that was supposed to protect the Cumberland River from a Yankee invasion. The fort fell as consequence of this battle and in the process so did a vital part of Tennessee. It was a major confederate setback.

The battle itself consisted of to major clashes. One in the morning of the 15th. The confederate a tried to make a breakthrough. They more or less succeed in breaking the Union line, but some bad decisions from the confederate commanders led to the halt of the confederate breakthrough, and the confederates returned to their original position within the fortifications surrounding the fort. The second part took place during the afternoon when the Unions forces decided to assault the fortification from the landside. The second attack led to irreparable damages to the southern morale. Furthermore the fort was by now once more encircled and back under siege conditions. This led to the eventual surrender of confederate forces the day after the attack. Much of the confederate failings in all this was put on the inept cofederate generals Floyd and Pillow. These two gentlemen ordered the confederate retreat back to the fort as well as boasting out a victory the evening after the battle, despite the obvious defeat.

The game itself was played using three standard gaming tables( 3 6ftx4ft tables). One of the tables was covered by river terrain. The one in the middle was covered by the field fortifications of the fort and the last one the area just south of the fort. The tables were connected together.

I could not use the orginal scenario in the scenario booklet since it had to be adapted to Black Powder and the restrictions given to use when it came to miniatures and space. The players commanded roughly one or two brigades each. Each brigade consisted roughly of 3 regiments. This does not really corespondent to the regiments present at the actual battle. Often in Acw battles the regiments have been grinder down to fragments of their orginal intended size and thus I often tend to merge units together in game scenarios. The main reason is to keep it all playable in this scale.  I had set the number of turns to 15. This proved to be unnecessary since the game was decided by turn 8. The main victory condition was that victory would be decided upon who was in charge of the outer defenses by the end of the game.
The Union side started the game by advancing their main force towards outer defenses. The Union would eventually gain a number of reinforcements, but they had the bulk of their force fielded at the start of the game. The southern side had only a few units within the fort when the game begins. This is due to the fact that most of the confederate units had just been ordered to fall back to the fart following their breakthrough attempt earlier that day. In game terms this means that the Confederates arrive piecemeal on the battle field. This will give the Union players a few turns in which they can rush forth troops to get a superiority in numbers that will enable them to storm the confederate fortifications. If the Union side is stalled or u decisive the Confederates will shore up the defenses with newly arrived troops.

How did our game evolve?

Well, the Union advance without hesitation towards the outer defenses, while the confederate soldiers did have some initial difficulties to get their troops back behind the trenches( the confederate players failed a number of command rolls, which delayed the arrival of some of their units). The Union side headed strait toward a part of the defenses that lacked a defending unit, apart for one single unit. A quick assault follows and the Union side had a number of units on other side of the outer defenses.
The confederates finally managed to get their main force on the table. Their main stratagem was to face the Union forces in their weaker left flank outside the defenses. This was sound judgement so far that they're outnumbered their enemy. However there was flaw in this scheme. This meant that they could not send enough troops to oust the Union breakthrough. Only a few units were available in the critical moment when the Union side started to pour in troops in the breech they had created. The single confederate brigade defending the works was soon broken while the Cofederates on the flak of the Union troops got nowhere.  By round 8 it was more or less over since no confederate troops inside the fort was available to defend the fort and the units outside the fort was locked up in struggle
that was stalling.
The starting positions. The Rebels will be reinforced from the road leading into the fort

The inner part of the fort


Union troops have just broken through the confederate defences

Union troops inside the first line of fortifications

Rebel troops tries in vain to dislodge the Union troops inside the fort

The field hospital

The Victorious Union general trying to be social withe the locals....

What about the Ironclad?

The Ironclad was given the task to first knock out the Rebel heavy guns defending the fort from the riverside. If the Ironclad bombardment would be succesful and the heavy artillery of the fort knocked out then the Ironclad could support the attack on the fort by bombarding the confederate units within the fort.
The scenario rules for the river engagement was written so that the closer the Ironclad would come to the fort the easier it would be to hit it. However if the Ironclad would come close enough it would be able to bombard the confederate land forces.
The Ironclad and shore batteries fired upon each other and both sides scored some hits. It was the confederate batteries that was knocked out first. By the time the river battle was over it had little consequence for the outcome since the Union forces had already dispatched most confederates within the fort.

The River batteries firing at the Ironclad. The batteries are hit as well

The duel between the Ironclad and the River batteries

Shots comming closer to the Ironclad

The Ironclad is taking a hit....


Was it a working scenario?

The players though so. From the description of it all it may seem to be a bit onesided, but I would say that the their are quite a few things that speaks I favor of the defending side. They have acces to the field works. The confederate players choose to put it all one one card - the flanking movement. It could have worked, but tat would have demanded that the few units inside the fort could have hold out a few turns more. Maybe a bit of luck would have changed that part of the game.

The pictures that took during this game was of rather poor quality compared to the ones taken by the players( I took part as referee). I do apologize for that. I suggest you check out the following blogs were the players covered the battle from their perpective. (...and the pictures are much better):

http://wargameinsvergie.blogspot.se/2016/03/black-powder-rules-battle-of-fort.html

http://latenightpainting.blogspot.se/2016/03/battle-report-black-powder-battle-of.html

http://latenightpainting.blogspot.se/2016/03/battle-report-black-powder-battle-of.html


Saturday, March 5, 2016

Glory in the East


Earlier this week we played another game of Pikeman's Lament as part of our ongoing campaign set during the war between Sweden and Poland 1625-1629.
This time we played the mission Morning Attack. This involves an attacker assaulting one of the defender's fortified camps after infiltrating a force around the defender's flank.
For this game we really went 'all-in' and used a whopping 54 army points per side. This is probably the maximum size for games played on a regular 6' x 4' table.
In this mission the attacker wins if he has more units inside the defender’s camp at game end than the defender does.
In our game, the Swedes were defending and the Poles attacking.
For details of the OOB, background and some more photos, go to Dalauppror's blog

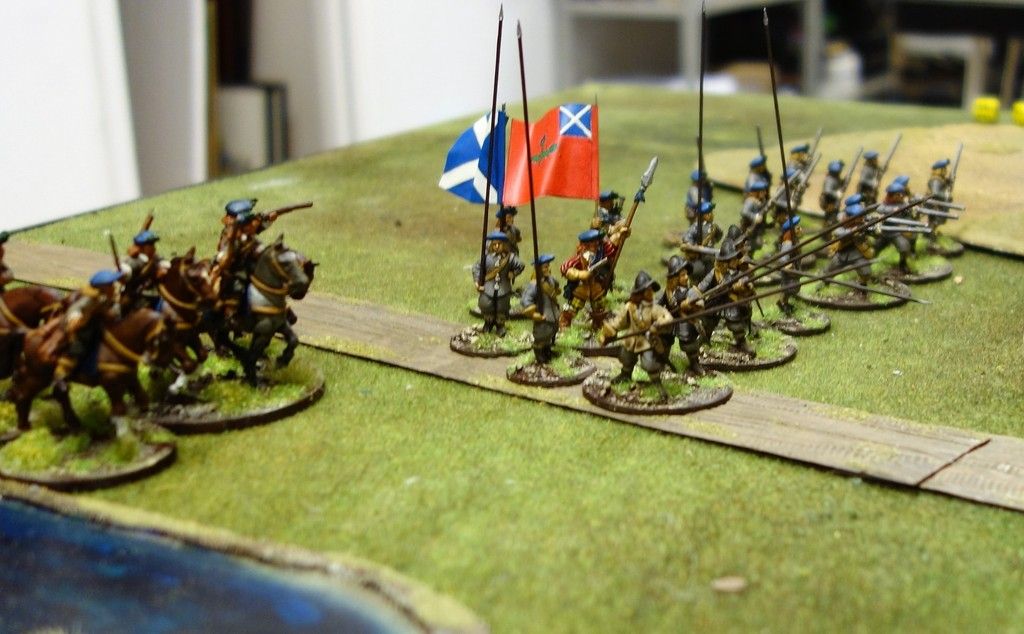
The Poles were divided into 2 commands of about 28  army points each.
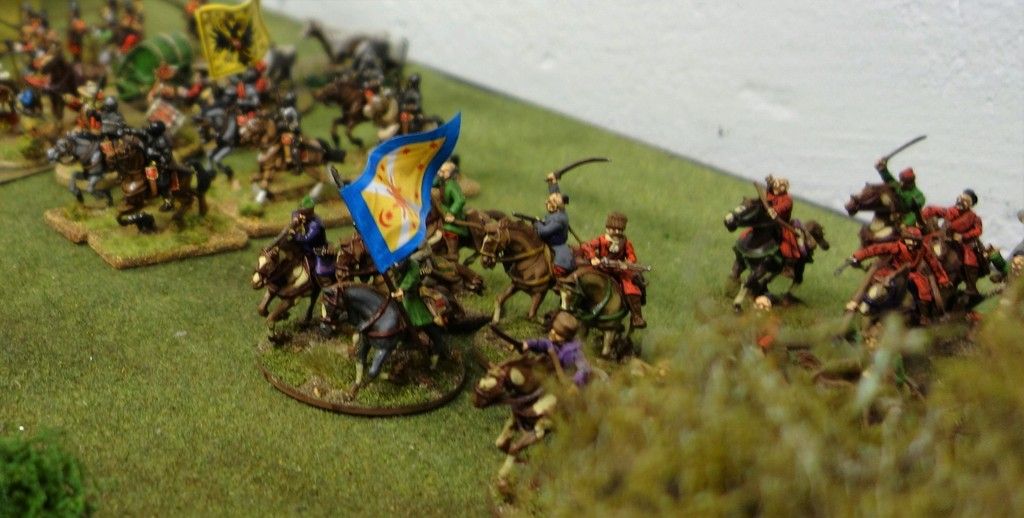
One command one consisted of Polish units led by Rotameister Janosz Kowalski. There was a unit of Winged Hussars (Elite Aggressive Gallopers) supported by two units of Pancerni (Gallopers) and two units of Hajduk musketeers (Shot).
The other command was led by the notorious turncoat van Kökkenpanne and his Flemish mercenaries. This contained a unit of Curassiers (Elite Trotters), 2 units of Forlorn Hope, one of Pike and one of Shot.
The slander and lies of our Polish enemies can be found at Skötkonung's blog.

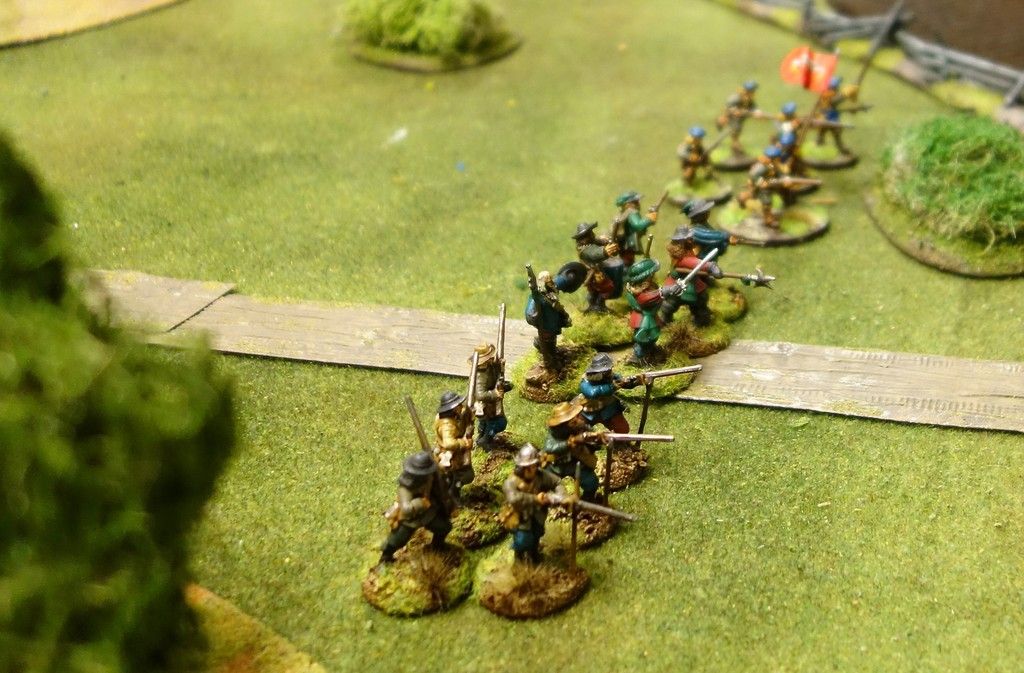
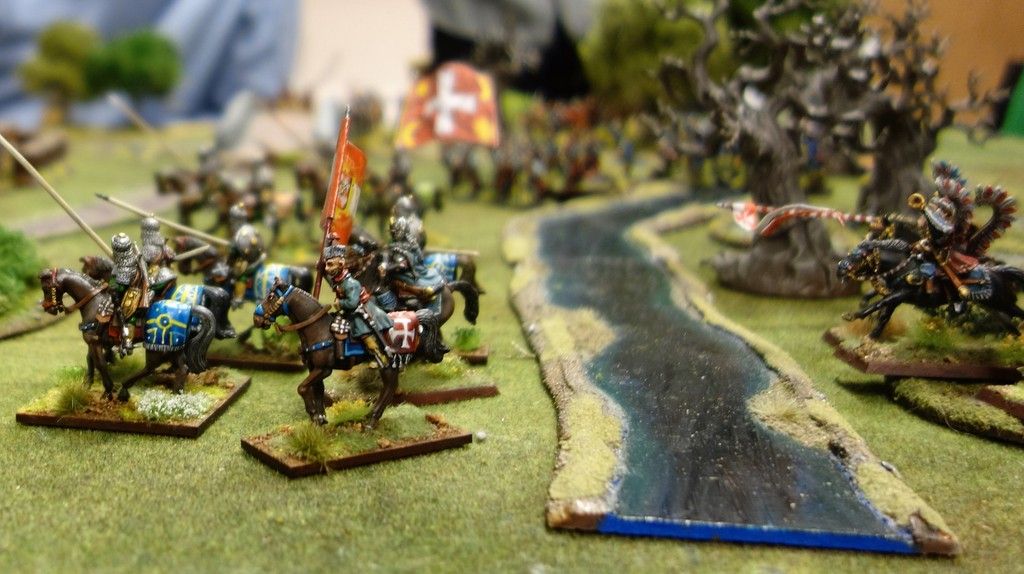
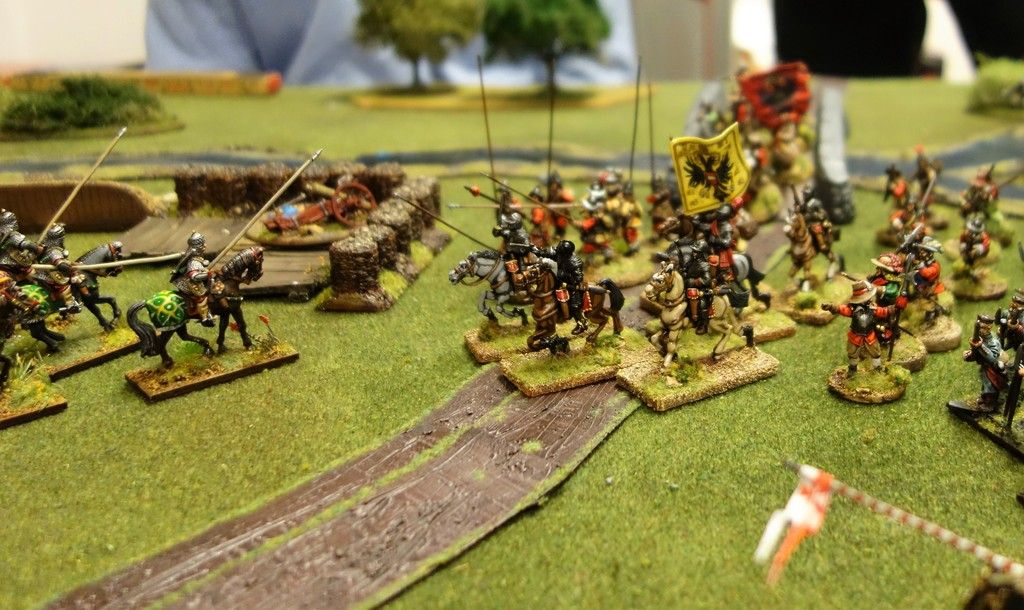
The Polish Rotameister's forces struggle to get out of the swamps and over the river
The Swedish force consisted of 3 companies of 18 points each.

Swedish camp garrison commanded by Ensign Håkan Nilsson Skytte
1 x Shot
1 x Commanded Shot
2 x Field Artillery

Scots Reinforcements: Mackay’s Regiment of Foot, commanded by Ensign Edmund Darrcounter
1 x Veteran Pike
1 x Pike
1 x Shot
2 x Commanded Shot

Swedish Reinforcements: Västgöta Regemente, commanded by Lieutenant Henrik af Hunneberg, 'Henrik the Hammer'
2 x Forlorn Hope
1 x Pike
1 x Commanded Shot

The Swedish Garrison command was deployed on table at game start, while the Swedish Västgöta Regiment units and the Scots entered during the game.
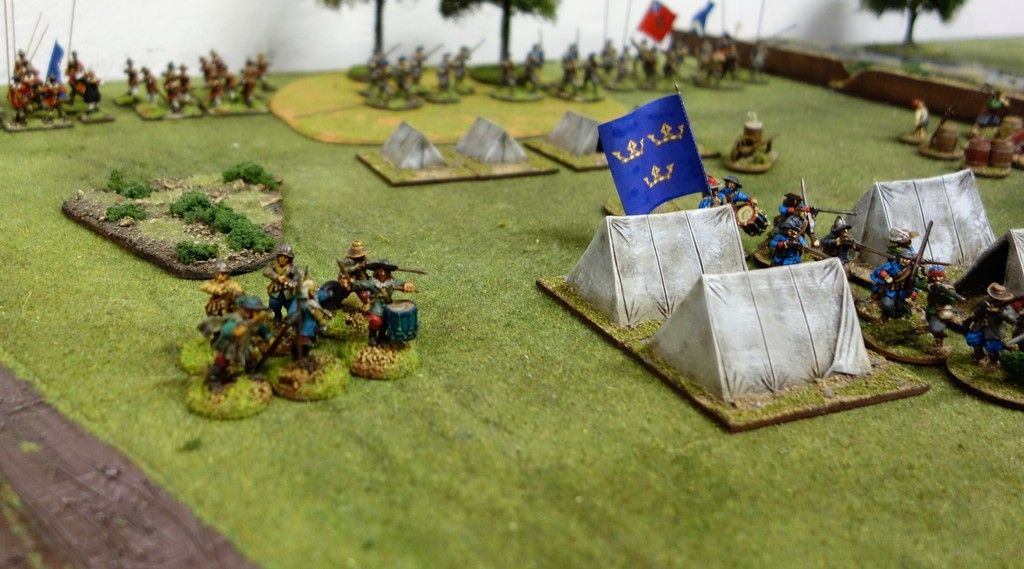
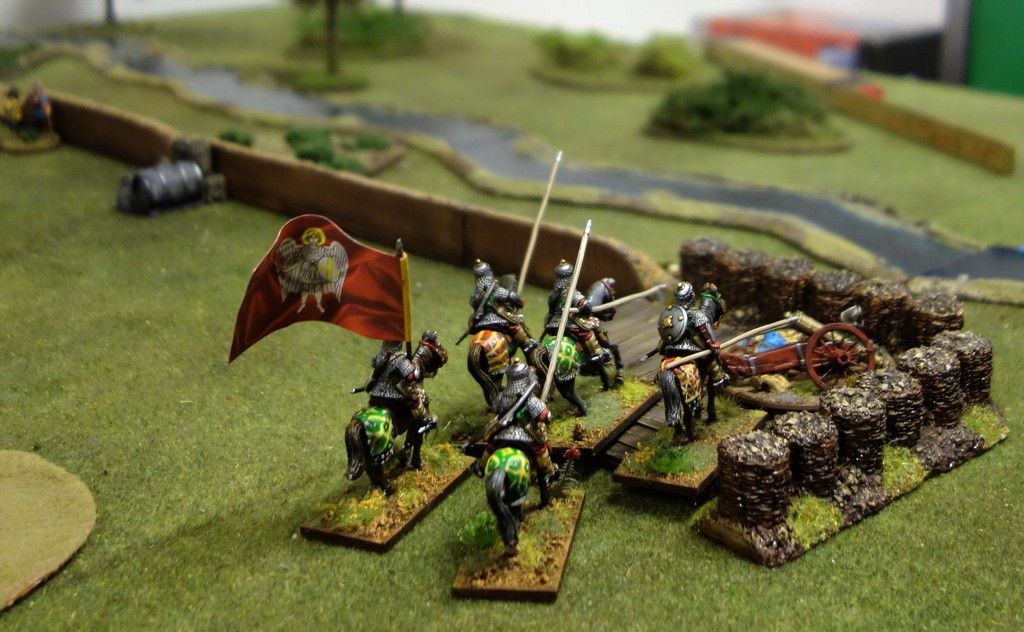
The enemy was concentrated on a very narrow front at the very end of the Swedish fortified line. van Kökkenpanne's notorious mercs were composed of a unit of Curassiers (classed as Trotters), a unit of Pike, one of shot and a couple of Forlorn Hope.
This allowed them to bypass most of the fortifications and concentrated their entire force against a single Commanded Shot Unit and a single heavy artillery piece. The other Swedish artillery piece faced an empty field, while the Swedish garrison Shot unit is still in camp.
The scenario started at dawn, where the Swedish garrison guarding the camp finds that the dastardly Poles have infiltrated a force of Pancerni and Winged Hussar cavalry accompanied by a Hajduk through a swamp and a river during the night. At the same time, the treacherous turncoat van Kökkenpanne and his Flemish mercenaries are approaching the bridge.
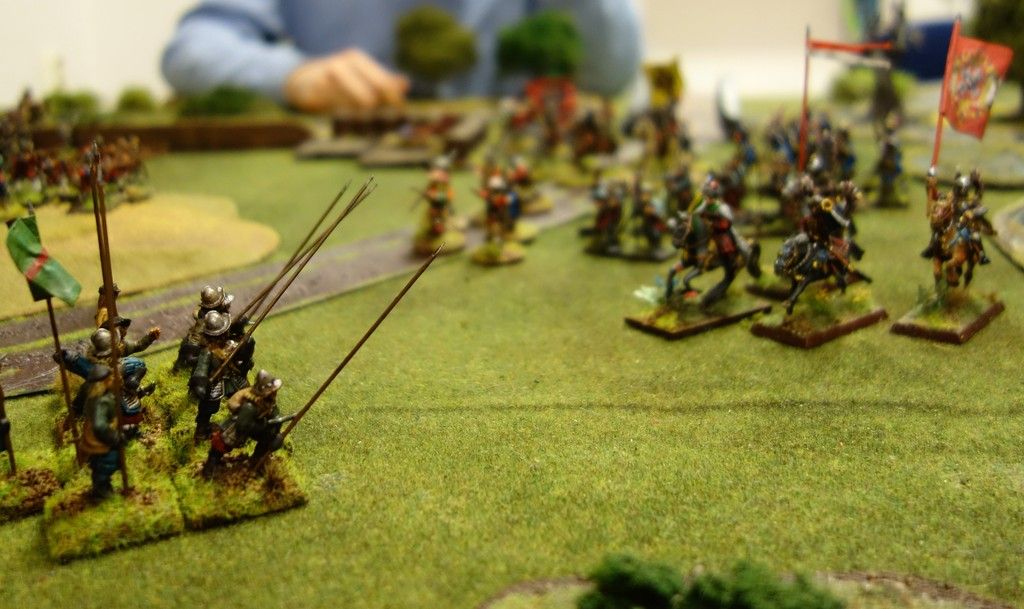
The Swedish and Scots reinforcements are on their way. But will they be in time to stop the enemy hordes?
The Scots started to appear at the short table edge. they did enjoy good command die rolls. No doubt the beneficial effects of a healthy breakfast of whisky and haggis. They did have an awful long way to march before actually meeting the enemy, though....

Unfortunately the initial Swedish and Scottish command rolls weren't that good and while the artillery piece managed to inflict some casualties on the advancing Flemish Pike on the bridge, the rest of the Swedish fire was largely ineffective. The other artillery piece (which was not allowed to move, it's too heavy) managed to pivot to face the enemy coming round the flank.
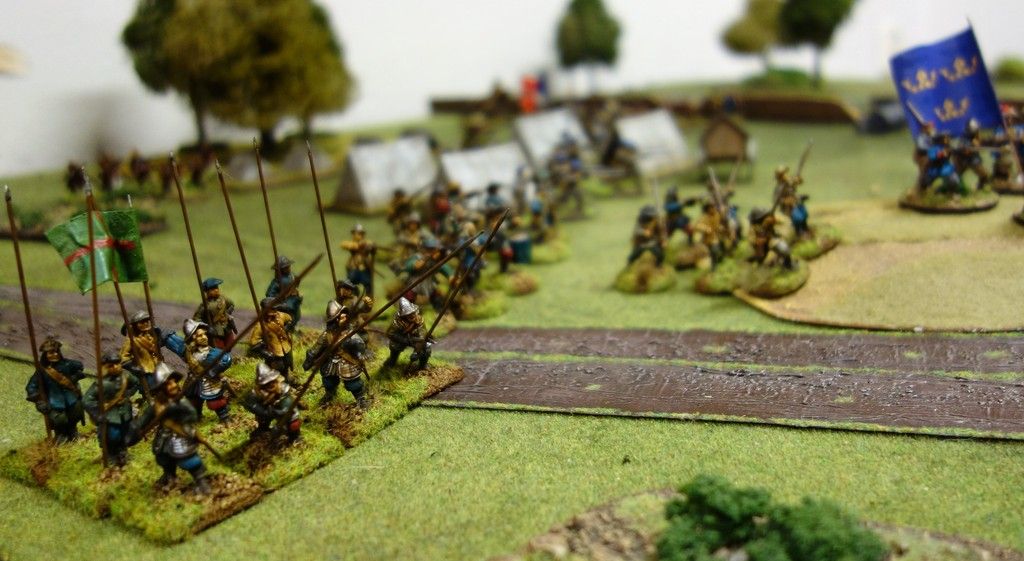
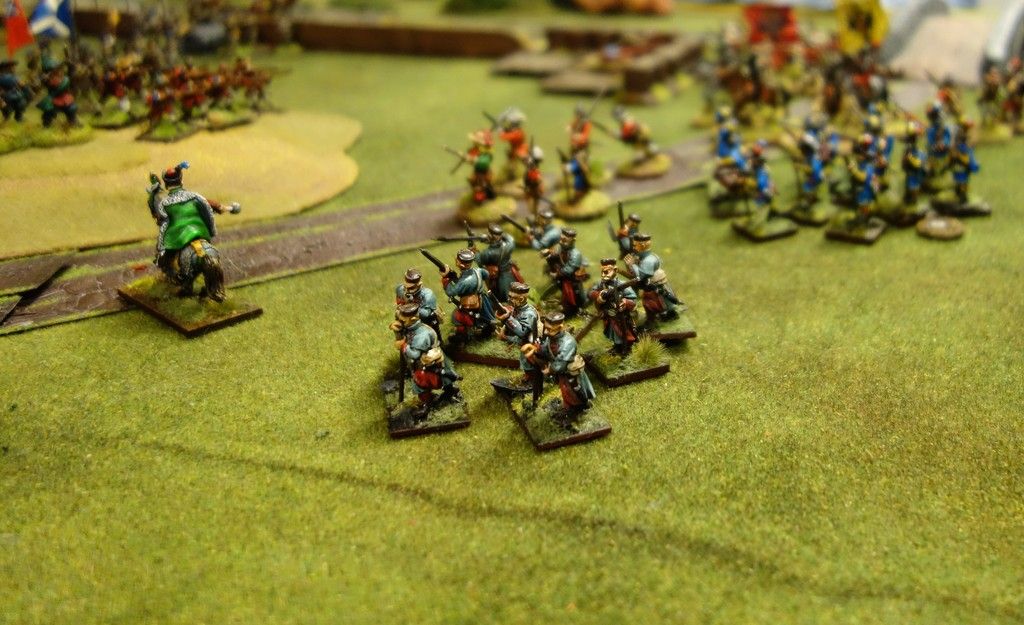
The Västgöta Regiment units march towards the enemy. The Scots and the Swedish garrison company in the background
Already at this point, the enemy concentration of forces proved to be very powerful with lots of enemy units coming in range to fire on the heroic Swedish Commanded Shot and the exposed artillery piece. But at the same time the enemy deployment had inherent problems as a 'traffic congestion' quickly developed with various enemy units blocking the advance and fire of their colleagues.

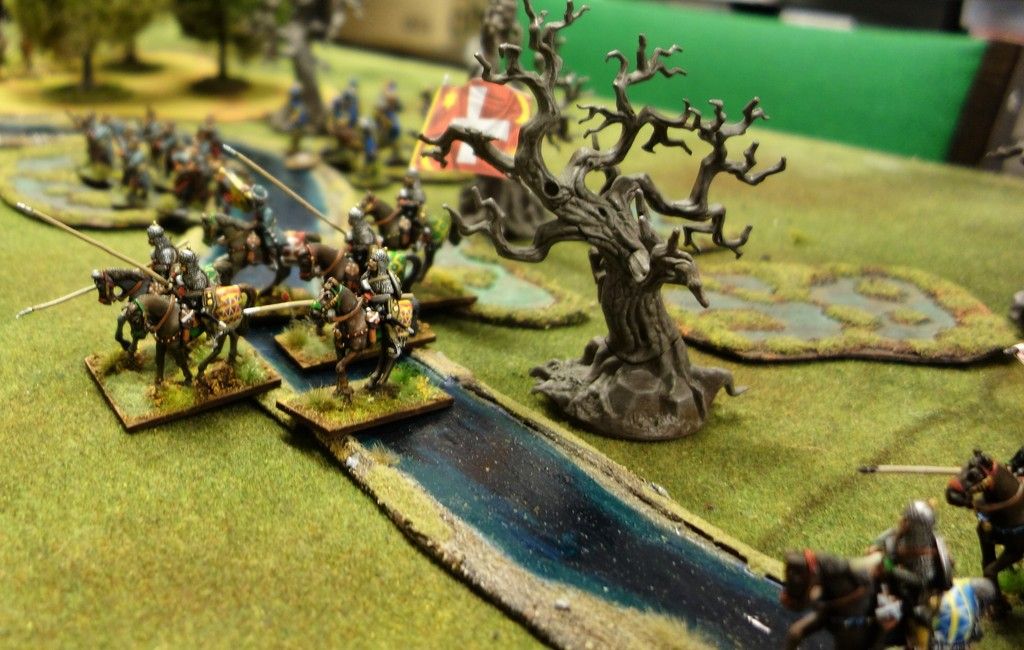
Polish units still not out of the river and swamps
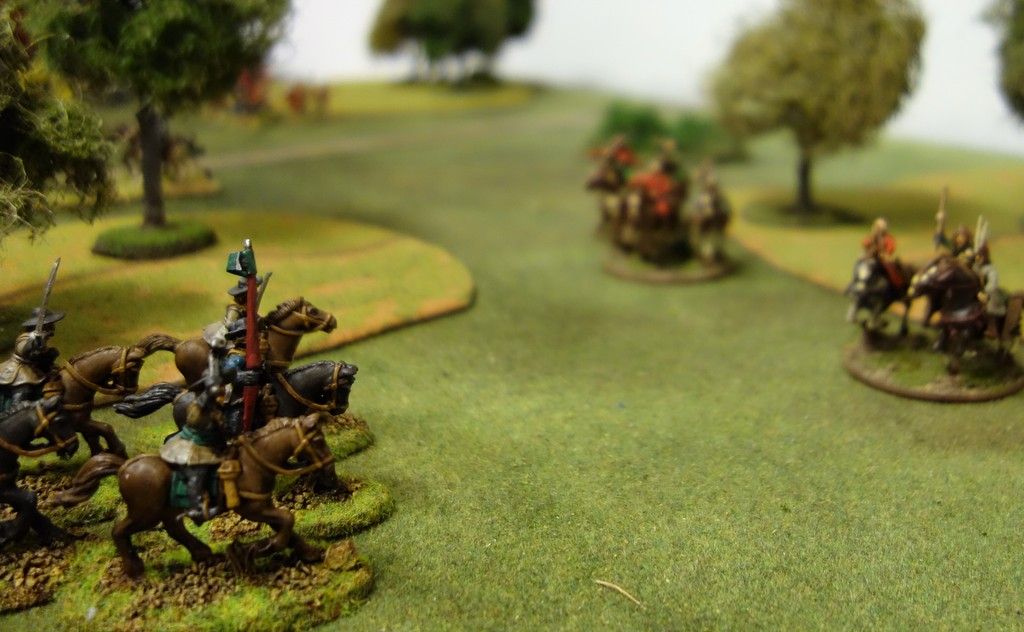
The Poles and Flemish pressed forward as rapidly as the constricting terrain would allow. Both the river and the swamps halved movement for most units, so even with good command rolls by the enemy, the advance was not terribly swift.
In the following couple of turns fortunes were mixed. The brave Swedish Commanded Shot were quickly dispatched by concentrated fire from Polish Haiduks. And the Swedish artillery failed to make much of an impression on the advancing Flemish.
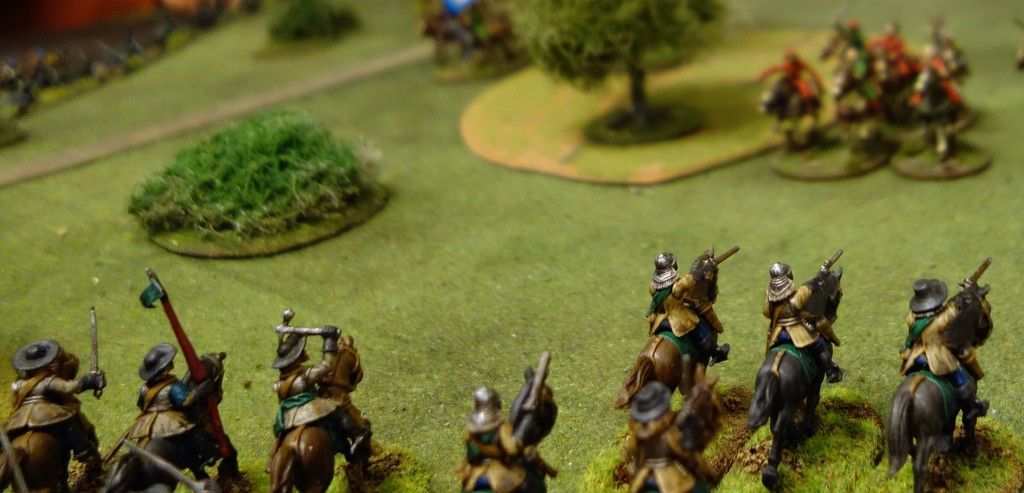
On the other hand, the command die rolls of both the Västgöta Regiment and the Scots were much better and both companies advanced quickly to towards the enemy while the advance of both Poles and Flemish were greatly hampered by congestion and the terrain. The Shot of the Swedish garrison company also made good time and advanced onto the hill facing the combined enemy forces, closely followed by both Scots and Västgöta units.
The Polish Pancerny are finally across the river, but the Winged Hussars are still getting their feet wet....
The only set back in this was a disastrously bad command roll by the Scots which saw one of the Pike units withdrawn from the field (apparantly the commanding general had decided it was more urgently needed elsewhere. Darn…
The Polish Pancerny cavalry were first across the river and promptly charged our brave units on the hill. They had very mixed fortunes in this. While they managed to inflict some casualties on the Swedish Shot, they were repulsed with losses.

One of the Pancerny unit quickly changed direction and charged our artillery from behind eliminating it. Ouch.
The Pancerny destroy our valiant artillery. But vengeance will be quick
The other Pancerny was quickly eliminated by a hail of musket fire after charging the garrison Shot.

The Pancerny charge the Swedish garrison musketeers. and the artillery.
However, the other Swedish artillery unit had pivoted in place and opened fire together with advancing Scots and avenged the lost artillery by eliminating the Pancerny.
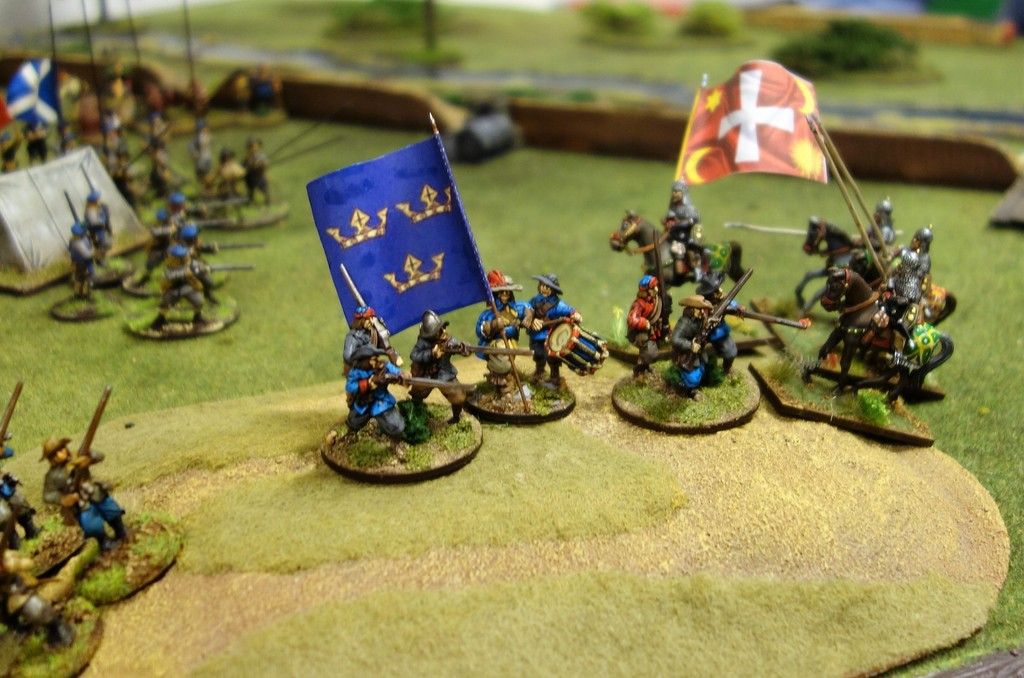
Västgötar and Scots advance to support the garrison Shot unit on the hill.
The Västgöta units were now racing to support their comrades on the hill.
The charge of the Pancerny fails and the cavalry are forced off the hill in disarray.
The Swedish garrison musketeers are finally forced off the hill, but are replaced by Västgöta units and Scots musketeers.
The retreating Pancerny seeking shelter among the advancing Flemish moments before being shot to pieces by the remaining Swedish Artillery
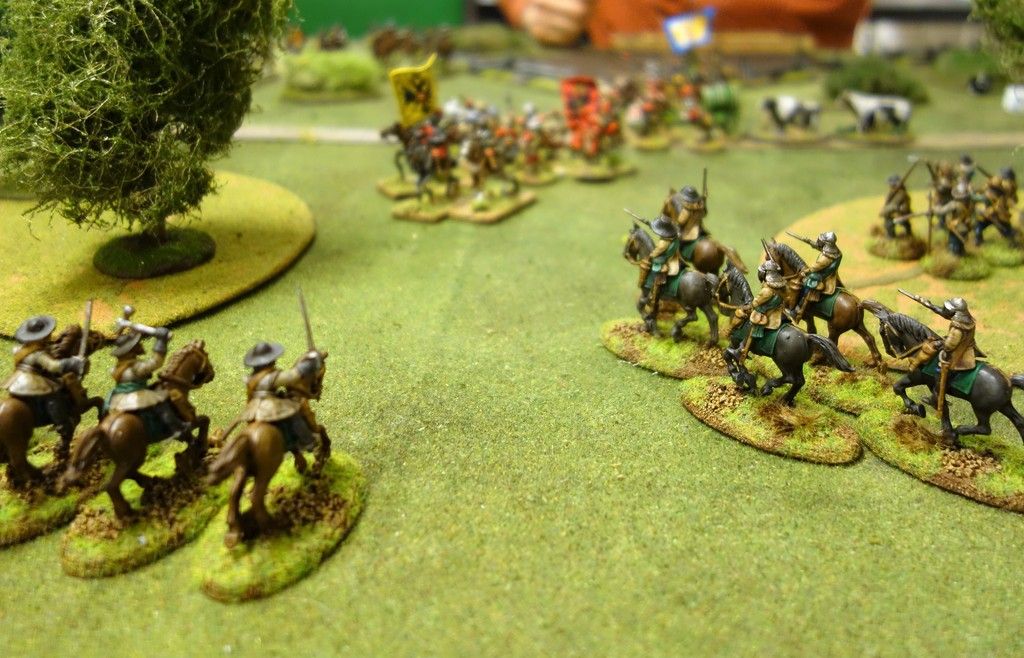
The Flemish has suffered more than their Polish paymasters from the restricting terrain and the congestion of units and were only now entering the combat in earnest.
The doughty Västgöta pikemen repulsing the Polish nobles led by the Rotameister himself.
At the same time the brave Västgöta Pike had advanced far enough to come into charge distance of the enemy Winged Hussars. The Polish nobles are a notoriously impetuous lot and promptly charged the Pike.
Mutual destruction. The frustrated Winged Hussars reform to try another charge at the stubborn Västgöta pikemen
The Hussars are ferocious, but they met their match in the Västgöta Pikemen who repulsed them twice and reduced their numbers to less than half before finally going under.
The few surviving Hussars then impetuously charged the Västgöta Commanded Shot on the hill, but were repulsed with further casualties. And finally a salvo of musket fire from the Västgöta Forlorn Hope commanded by Henrik the Hammer himself cut down the evil Rotameister.
The Polish Rotameister moments before being shot out of the saddle by our marksmen. The Polish Haiduks behind are unable to help their leader
While this epic battle was going on a great musketry duel was taking place on the hill with massive casualties suffered by both sides. The brave Swedish Shot were forced off the hill, but were replaced by Västgöta Forlorn Hope and Commanded Shot that proceeded to deplete one of the Polish Haiduk units and severely reducing the Flemish Forlorn Hope, before in turn being forced off the hill again by the Flemish Curassiers.
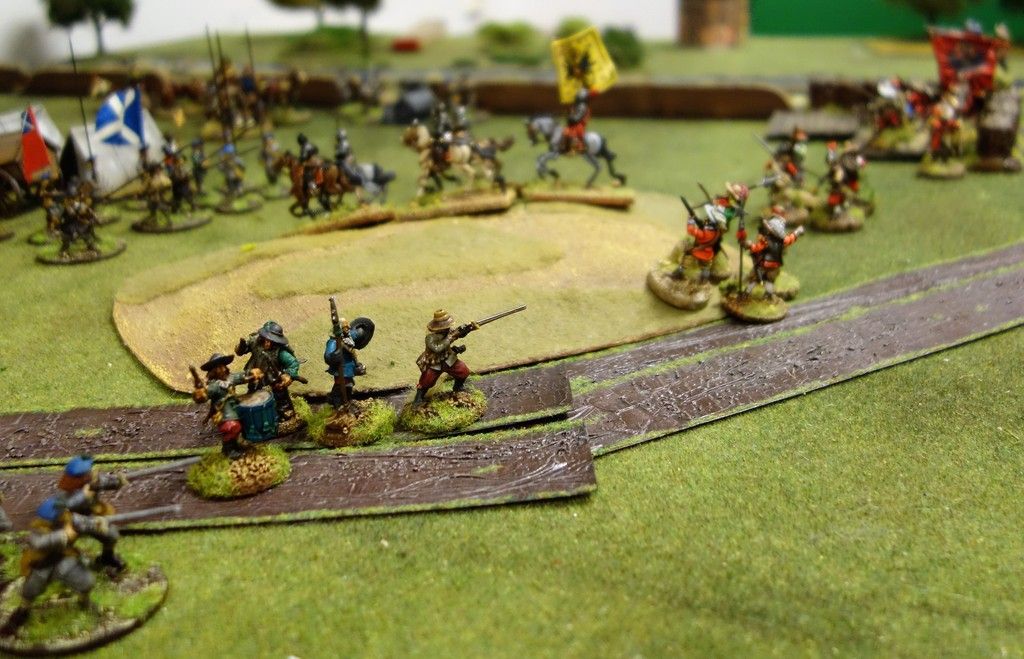
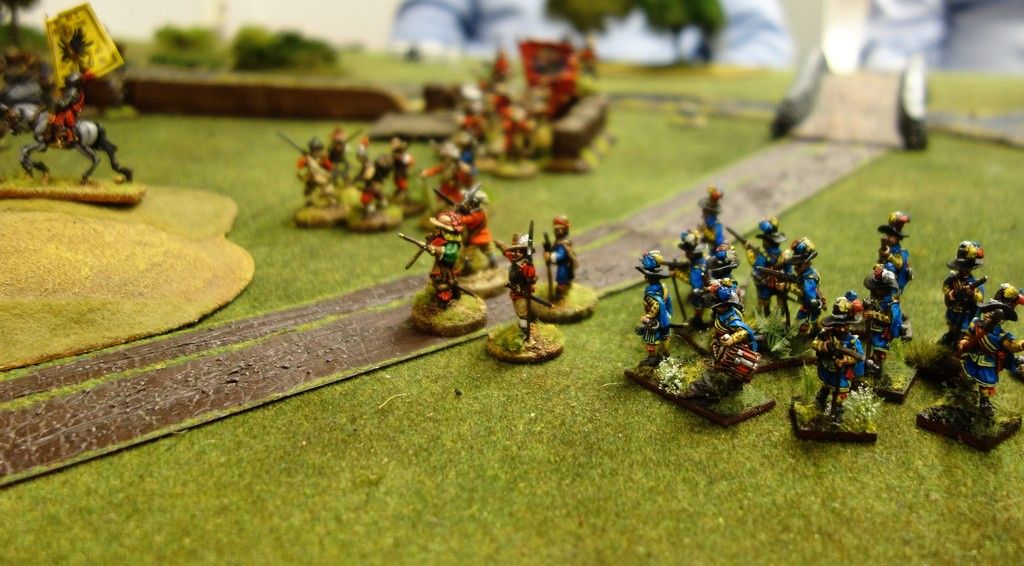
Västgöta units and some Scots musketeers advance onto the hill and straight into a major fire fight.
The Flemish Pike and Shot pressed forward and along the redoubt but were met by heavy fire from the remaining Swedish artillery piece and Scots Commanded Shot.
The Flemish Pike were mauled by this fire and fled to the rear, only to be replaced by the Flemish Shot, who also took serious casualties but managed to hang on.
By now, both sides had suffered massive casualties and the battle was drawing to a close. The only remaining Swedish garrison units was the artillery piece and a depleted Shot unit commanded by Ensign Skytte. The lone Västgöta unit still in the field was the Forlorn Hope Commanded by Henrik, while the Polish command only had a single Haiduk unit left. The Scots were also severely weakened, and so were the Flemish mercenaries.
The end is near. The Västgöta Forlorn Hope and Scots Commanded shot destroy the Polish Haiduks and are now reloading to have a go at the Flemish Forlorn Hope
The end came quickly as the Västgöta Forlorn Hope and a Scots Commanded Shot destroyed  Polish Haiduks.
The Flemish Curassiers had finally managed to clear the hill, but it was too late. At this point the battle ended with a Swedish win as the enemy had failed to get a sufficient number of units into the Swedish camp.
A most glorious victory for the Swedish army and our loyal Scots friends.
The end. The few remaining Polish and Flemish lack the strength to take the Swedish camp.
In recognition of this success the Scots commander Edmund Darrcounter was promoted to Lieutenant and gained the trait ’Brave’ (fittingly enough; ’Scotland the Brave’, and all that….). This trait means that units close to their commander get an increased morale bonus due to his inspirational leadership. The playing of bagpipes will no doubt have to be endured at tonight’s celebratory haggis & whisky dinner in the Scottish camp….

At the end of the game we realized that Henrik had also managed to accumulate enough Honour to be promoted to the lofty rank of Captain. The promotion brought with it the trait Tactician. This means that Henrik gains a modifier to the pre-game die roll to determine who is the Attacker. Henrik isn’t quite sure how to use this new ability, but is very happy about the promotion. So in the Västgöta Regiment camp there will also be a major celebration, carefully avoiding the Scots haggis. There will be a large helping of Aquavit for the troops, though.