
There was a need for some more 28mm to the club's upcoming ACW games. So I had two options either buildings something from scratch or to buy something more or less ready made. After scanning the net I found an interesting option. There are nowadays quite a few companies that offer terrain/buildings in lasercut MDF. That is always an interesting option. i have bought a few such models kits before. Usually these kits needs quite a bit of work before you kan put them on the table, but the end result is usually quite good. So I decided to give it another go. I bought a kit made by Sarissa Presicion Ltd.


The kit is labeled as a " Plantation House with Porch". It is made from 2mm MDF. It's 140mm x 125 wide and the heigt is 155mm. As you can se the whole things is a kit that you need to assemble it before you paint it. Though a good adwise is to carefully study the model before you that. If you put it together all at once you will have hard time painting it. Instead I suggest you do step by step putting bits and pieces together step by step.
Step 1

I started to paint the basecoat before I assembled the main structure.

The first parts of the house are put together
I suggest you start building the main structure, the outer walls. Do not build the porch yet. The window lids can also wait. Apply the base coat. In this case the base coat is black. You can probably spray paint it without any problem, but I tend to do this manually( I don't think that this really matter). Se to it that that all the black coat is solid, but do not Apple to much paint. The etched parts might disappear if you do.
Step 2.

The first drybrush
Apply the second coating. When I paint buildings I usually drybrush a thin lager of olive green or a
mix of brown and green. This will give you building the worn look of a building that have been
standing without proper maintenance for quite a while. To get the best result see to it that the brush is
almost out of paint. If the paint is too thick then you will cover the etchnings on the model and that is not good. This trick is mentioned by the late and most prominent builder of wargaming models Ian Weekly. He had a few really good articles about this in the long gone wargaming magazine Practical Wargamer.
Step 3.
The ground floor

The ground floor with a black coat

The upper floor being assembled
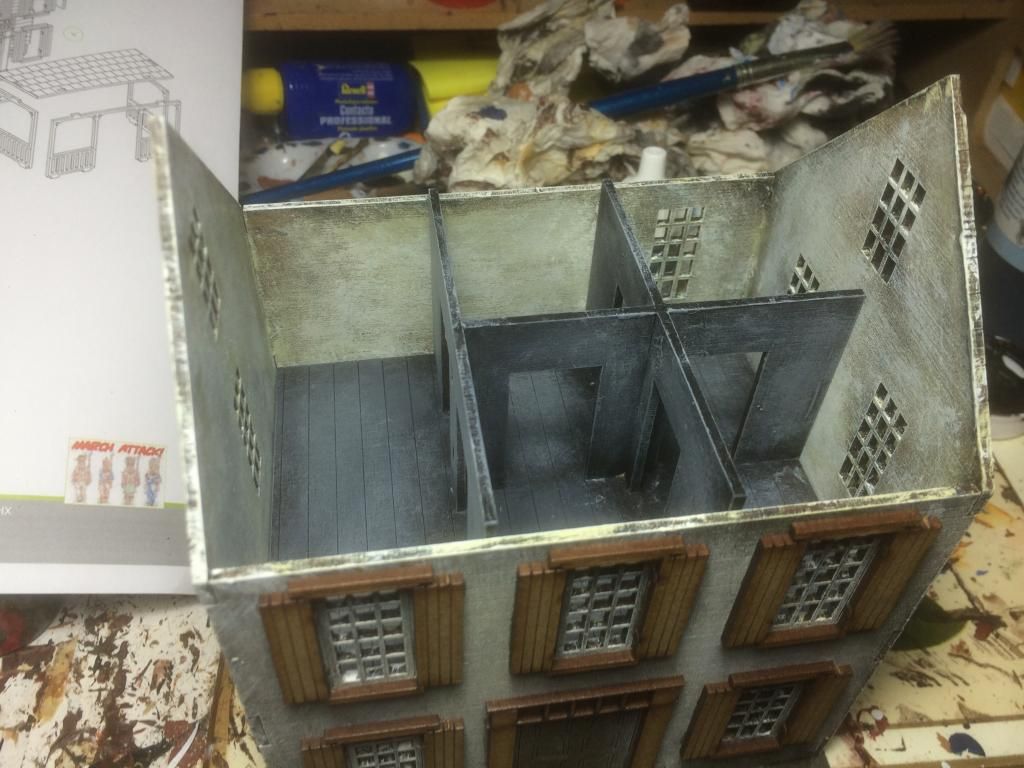
The final look of the interior
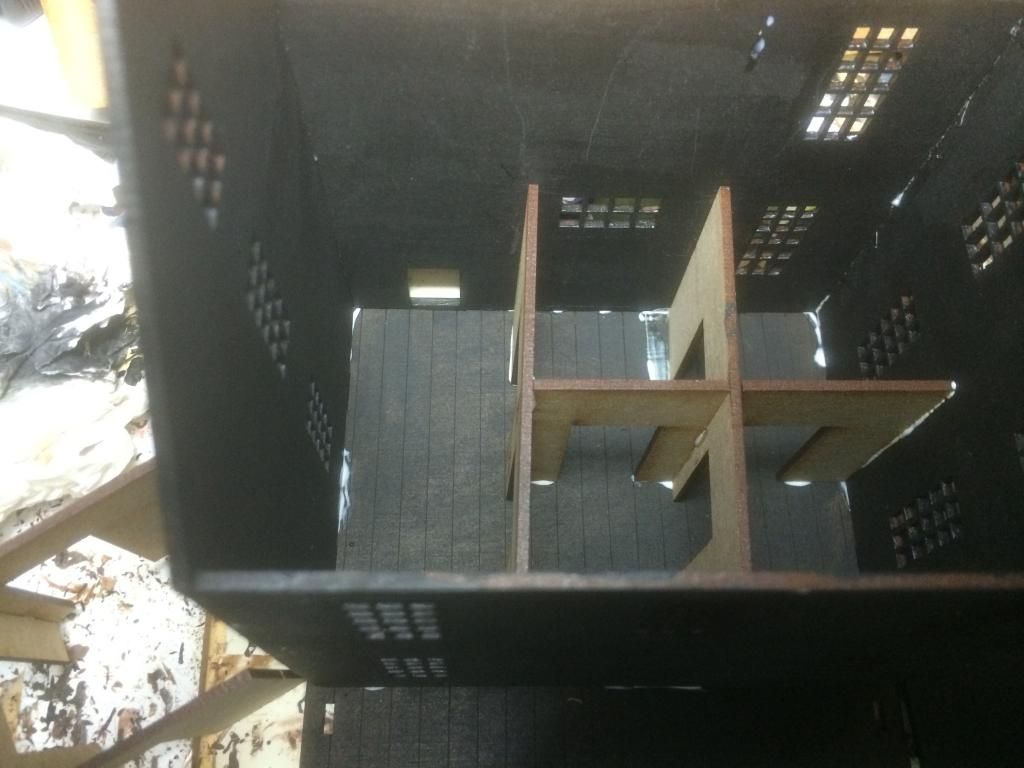
Start working on the inside. Give the interior a black coat and assemble the inner structure. The model is designed so that you will be able to use it in skirmish games. Thus you are supposed to be able to remove the roof and place models inside the building. The are even two levels within the house. You can place you models both upstairs and downstairs. For the you the one putting it all together this is quite a challange this is indeed a prescion model. To much glue or paint and you will not be able to insert the inner structure. So go easy on that part.
Step 4.

Go back to the outer wall. Give the exterior an other dry brush. This time I mix bone white or ivory white colour with a bit of grey. The bone/ivory white should by a the major part of the mix. Once more see to it that most of the paint is removed from the brush before you start. Some tine parts should be left uncovered so that the second coating shines through.
Step 5.

The widow lids are attached to the outer structure

The window lids are painted olive green, then some Agrax Earthshade is used as a wash.
Attach the window lids. It attachés them unpainted, but you can consider giving them a base coat. I painted them olive green straight away. The reason is that I figured that window lids tends to be repainted more often than outer walls. Thus they do not have the same worn look as the outer walls. To emphasize the etchings on the lids I game them a wash using Games Workshop's Agax Earthshade
Step 6.
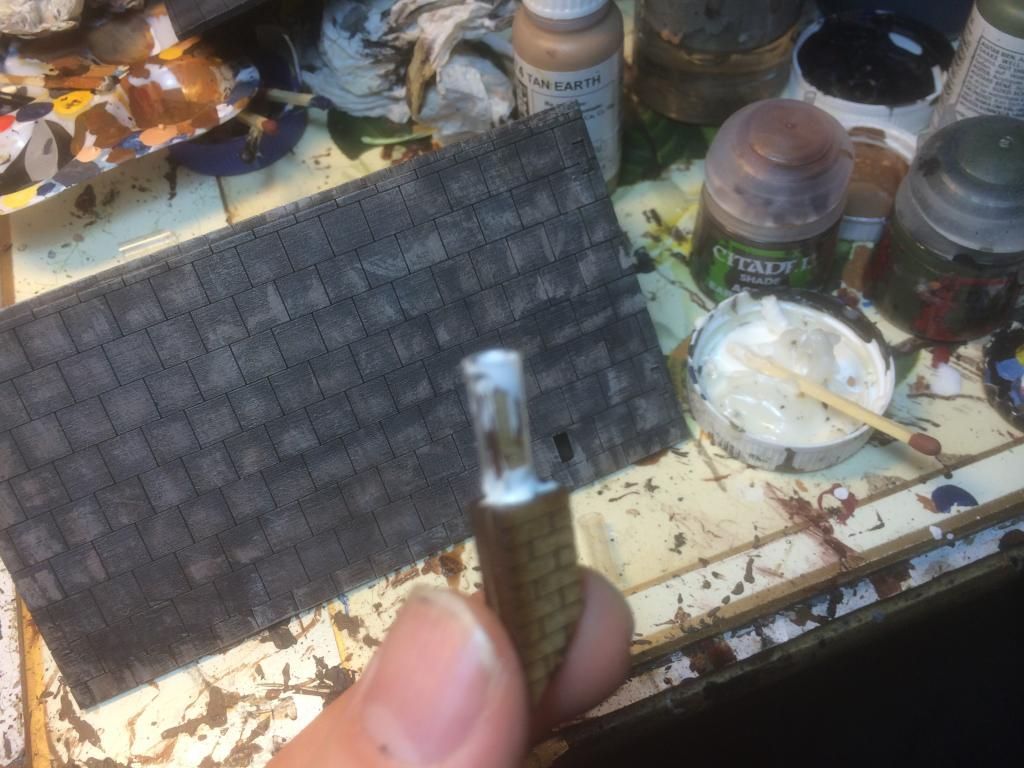
The roof under construction. Brush protectors are used to add some extra piping to the chimbeys.

The roof, more or less finished
The Roof should be removable and Thus handled as a seperate piece. You assemble it and give it a black coat. As before be aware. Do not cover the etchings otherwise this building wil not have any roof shingels. It's a three step process. First the black coat. Then drybrush greenish brown. Finally
drybrush it all grey. You can give it other layer of even lighter grey to really heligheten the general impresssion. I dotted some light grey on each shingel in other to get the right look. I found it rather tricky to get this right.
drybrush it all grey. You can give it other layer of even lighter grey to really heligheten the general impresssion. I dotted some light grey on each shingel in other to get the right look. I found it rather tricky to get this right.
Step 7.
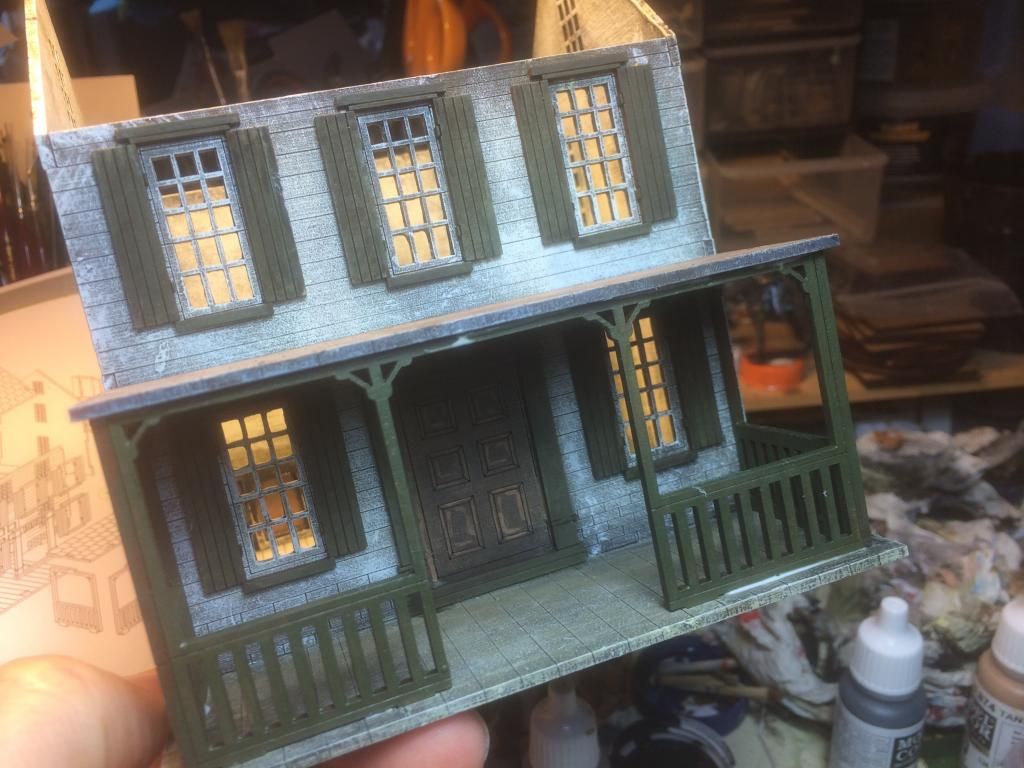
Build the Porch . This is not that hard. I painted the porch in the same colour as the window lids. I used the same wash and then I attached pieces to the building.
Step 8. A final dry brush
This time I gave it a white dry brush. Not the entire surface of the building was covered. Just enought to producera white highlights.
Step 9
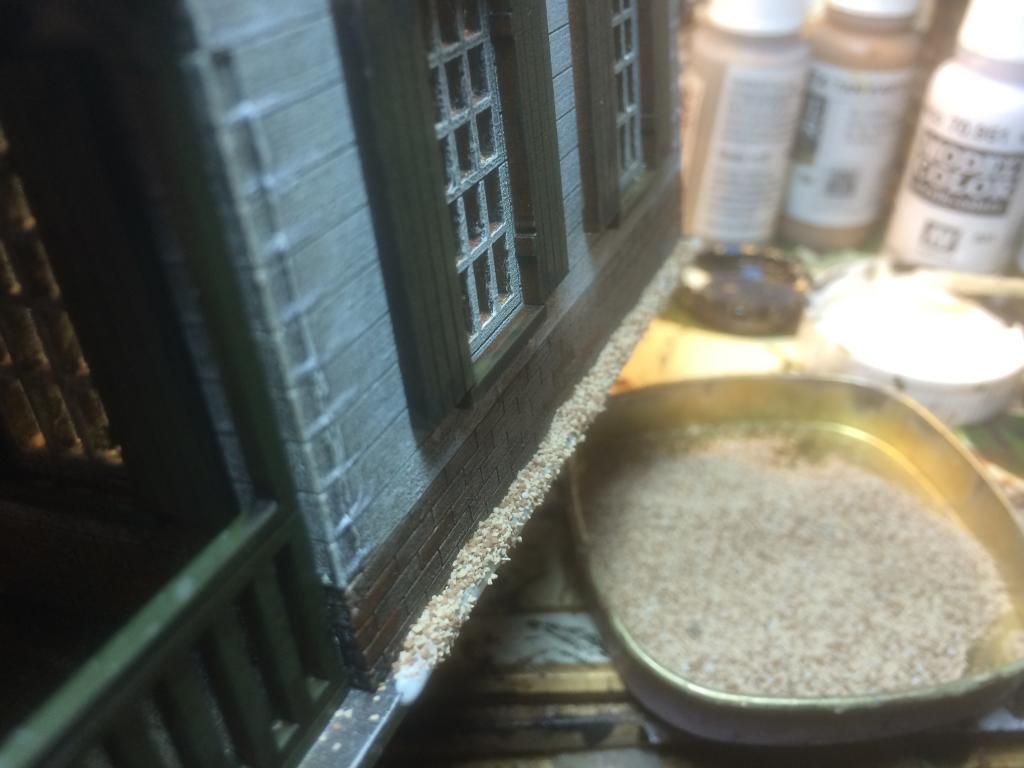
Model railroad gravel added to the base of the house
Just the detailing and finish touches
I applied some railroad gravel to the base of the building. Then couloured it with burned umber, then drybrushed it with raw sienna and ivory white. Some model static grass was added to finnish it off.
In order to protect the building from the forces of ungently handling by eager wargamers I applied some gloss coat, then some dull coat. If that is really necessary is different question.
.....and that was about it
Lovely job and nice to see how you went about painting it.
ReplyDeleteThat looks wonderful! Great work!
ReplyDeleteGreate work and good tutorial matey !
ReplyDeleteThank you gentlemen! There will be more of this. I ordered an Ironclad from them....in MDF of course. So there will be another building report of some kind eventually.
ReplyDeleteVery nice tutorial Jesper, it's always interesting to see which techniques others are using. The finished piece looks excellent!
ReplyDeleteThank you Jonas! I wish to see some of your terrain pieces in a tutorial some day. i know you have some great building skills.
ReplyDelete